Welcome to the TIFF Server set up guide, if you have already installed the prerequisite start from step 3 else start from step 1
- Unzip the Archive to the install location. This may be under “C:\Inetpub\wwwroot\tiffserver” or another location of your choice.
- Run the TIFF Server.msi file to install the prerequisites.
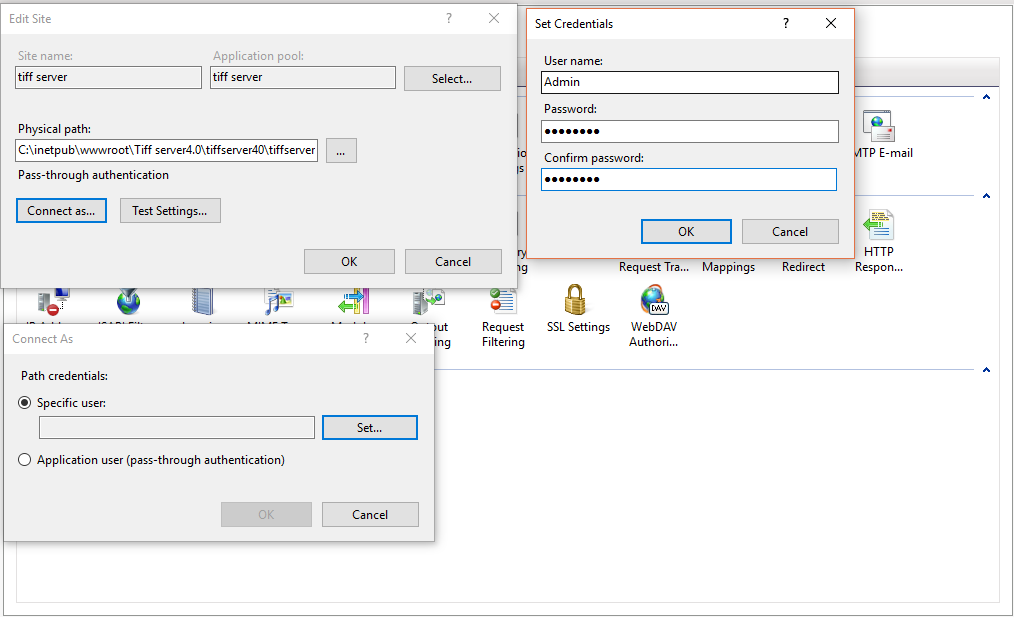
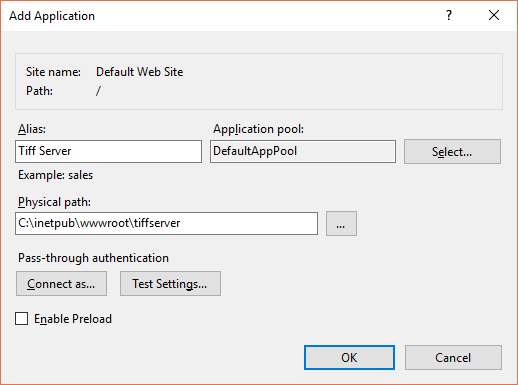
- Add TIFF Server as a web application or as an application under a website is IIS.
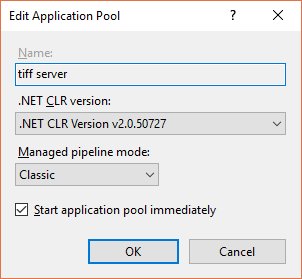
- Set the Tiff Server Application pool to the following:
- .Net CLR Version = .Net CLR Version v2.0.50727.
- Managed Pipeline Mode = Classic.
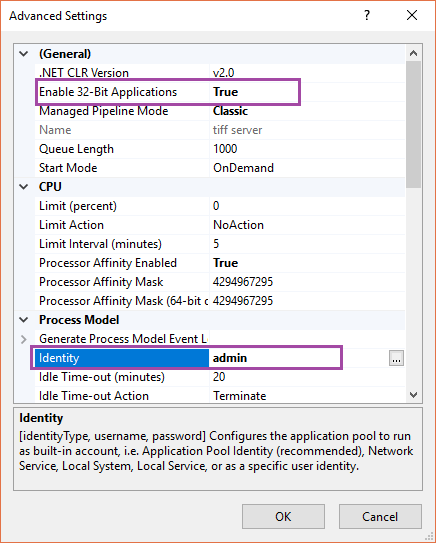
- Select the TIFF Server application pool and click on the “Advanced Setting” option on the right, set the following options in the dialog box that appears.
- Enable 32-Bit Applications = True.
- Identity = To a user with admin rights to all the files used by TIFF Server.
- In order to ensure that TIFF Server can write to the log or audit files and access other installation files it should be configured to either use Integrated Windows authentication or anonymous access with a suitably privileged UID.