1 Configure OAuth 2.0 for Exchange Online
To access resources in Exchange Online using OAuth 2.0 authentication, applications must acquire an access token from the Microsoft identity platform. The access token contains information about the permissions it has for the resources available in Exchange Online (such as send mail, read mail, etc.). To get an access token, the app must be registered with the Microsoft identity platform and be authorized by either a user or an administrator for access to the resources it needs.
When an application requires access to resources, it (usually) interactively prompts the user to authorize the application to access the resources it needs.
However, most Aquaforest products run as background services and as such cannot use interactive user prompt to authorize access Exchange Online every time an email has to be sent or emails have to be read to download attachments. For such applications, the OAuth 2.0 client credentials grant flow must be used to get access tokens from Azure AD, which uses an Azure app and expose it to client apps by adding an example scope. By registering an Azure app and exposing it through scopes, you can provide permissions-based access to its resources to authorized client apps (in this case Aquaforest).
The basic steps required are listed below and explained in detail in the following sections:
- Register your app.
- Configure authentication for the app.
- Configure API permissions that the app has.
- Get administrator consent for the permissions.
Once all the steps have been followed, you will have a value for the following, which needs to be supplied to the Aquaforest application:
- Application (client) ID
- Directory (tenant) ID
- Client secret OR path to a password protected certificate file (.PFX) and the password of the
certificate file
1.1 Register your app
To authenticate with the Microsoft identity platform endpoint, you must first register your app at the Azure app registration portal. You can use either a Microsoft account or a work or school account to register your app.
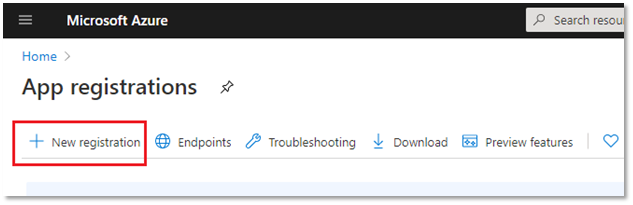
- On the App registrations page, create a new app registration by clicking on New registration
- Give a name to the application and click Register
Skip the Add a redirect URI. You do not need to configure a redirect URI for a web API since no user is logged in interactively.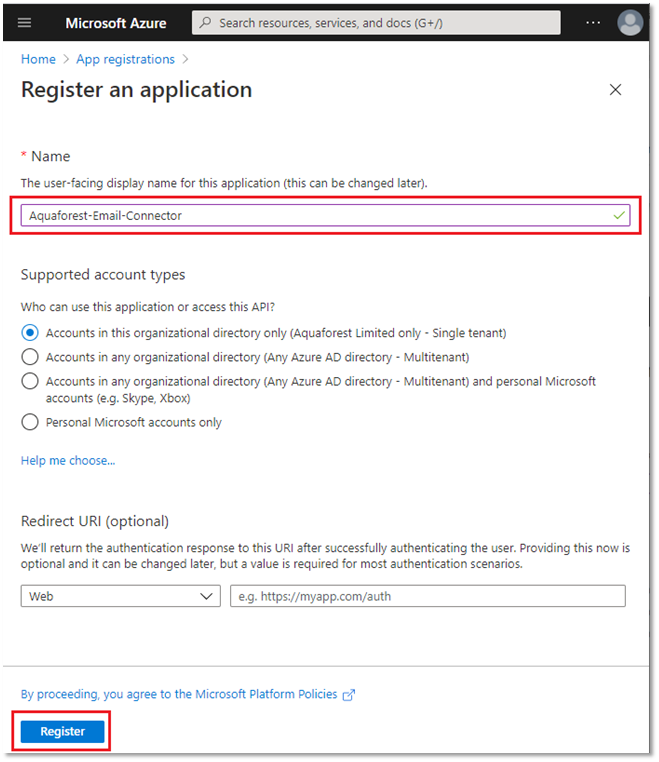
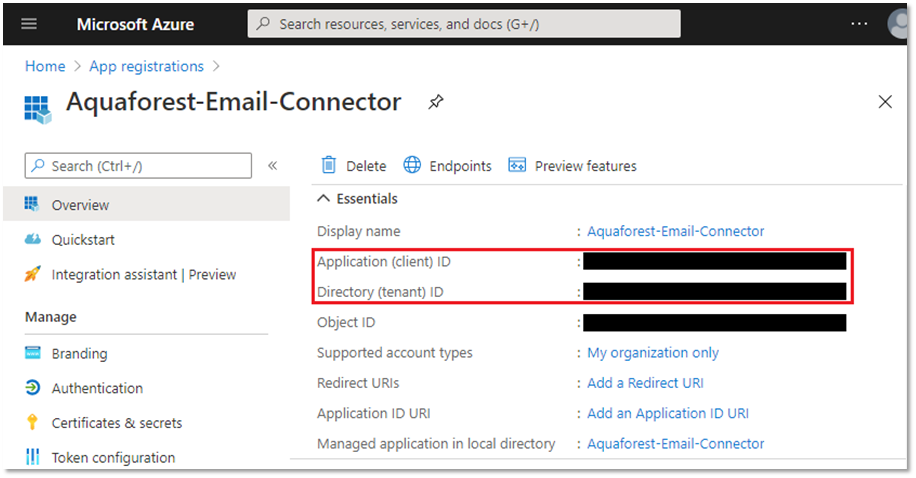
- Make a note of the Application (client) ID and the Directory (tenant) ID of the newly created application as this will need to be supplied to the Aquaforest application
1.2 App Authentication: Two options
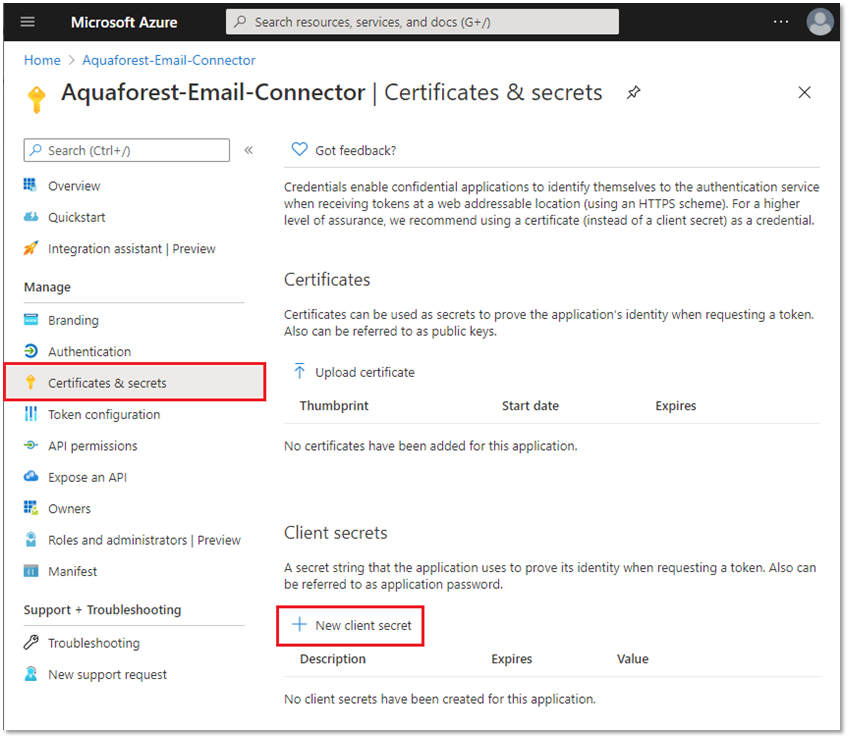
To enable the Azure application to identify and authenticate itself when obtaining auth tokens, you can either upload your own certificate or create a new client secret by going to Certificates & secrets in the Azure portal.
Depending on which option you use, you will need to keep note of values that will need to be supplied to the Aquaforest application.
| Option | Values to keep note of |
|---|---|
| Certificate |
|
| Client secret |
|
1.2.1 Option 1: Certificate
You can use an existing certificate if you have one.
If you do not have one, you can create a self-signed X.509 certificate which will be used to authenticate your Application. To create a self-signed certificate, open PowerShell with Administrator privileges and run the following script:
- Copy the PowerShell script from this blog
and save it in a file named “Create-SelfSignedCertificate.ps1” on your computer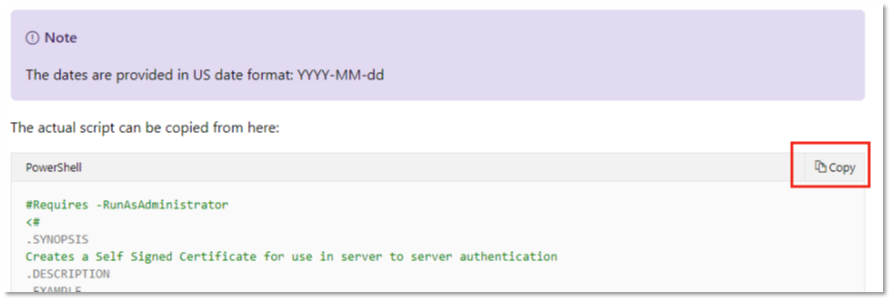
- Open PowerShell in Administrator mode
- While in PowerShell, change the directory to the location containing the “Create-SelfSignedCertificate.ps1” script file.
- Run the script by using the following command:
.\Create-SelfSignedCertificate.ps1 -CommonName "MyCompanyName" -StartDate 2021-01-15 -EndDate 2022-01-15
Note: Change the following values before running the script
- Change “MyCompanyName” to your company name
- Change the value of StartDate to the current date
- Change the value of EndDate to a date in the future when you’d like the Certificate to expire
- You will be asked to give a password to encrypt your private key, and both the .PFX file and .CER file will be exported to the current folder. Make a note of the path of the PFX file and its password as you will need to provide them in the Aquaforest application
To upload the certificate:
- On the Certificates & secrets page, select Upload certificate
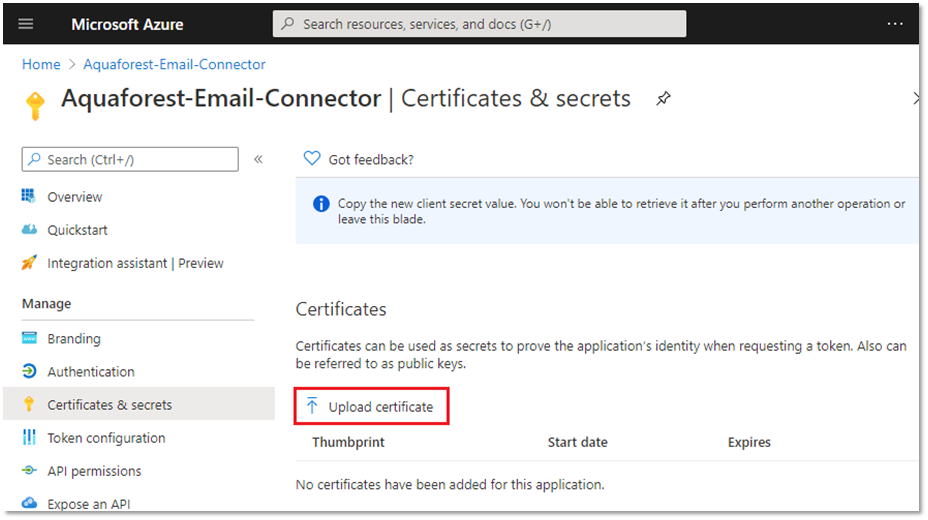
- On the Upload certificate popup panel, select the path of the certificate (either an existing certificate or the self-signed certificate you exported) and select Add
1.2.2 Option 2: Client Secret
- On the Certificates & secrets page, select New client secret
- On the Add a client secret popup panel, enter the details of the client secret, and click
Add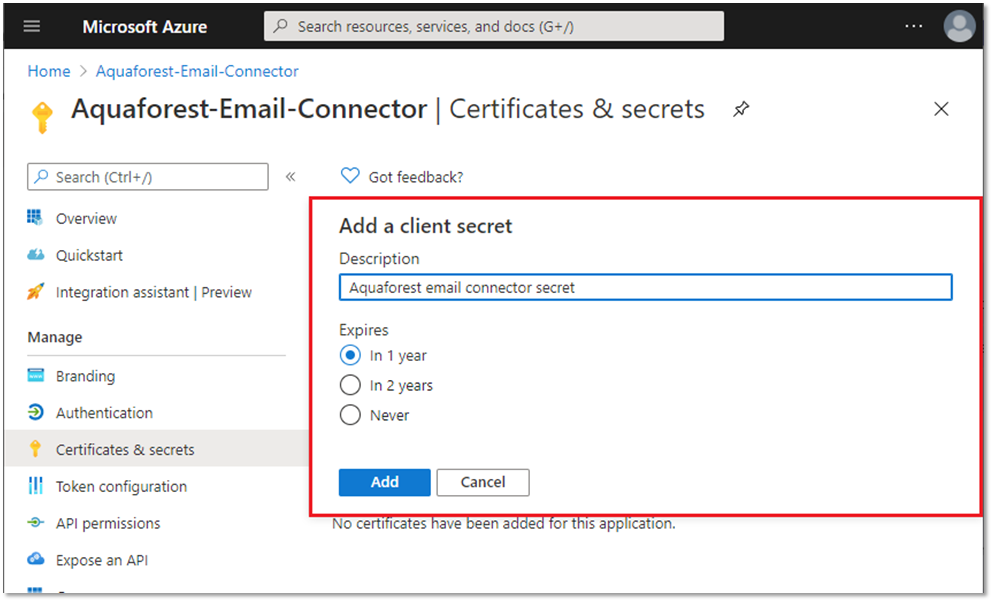
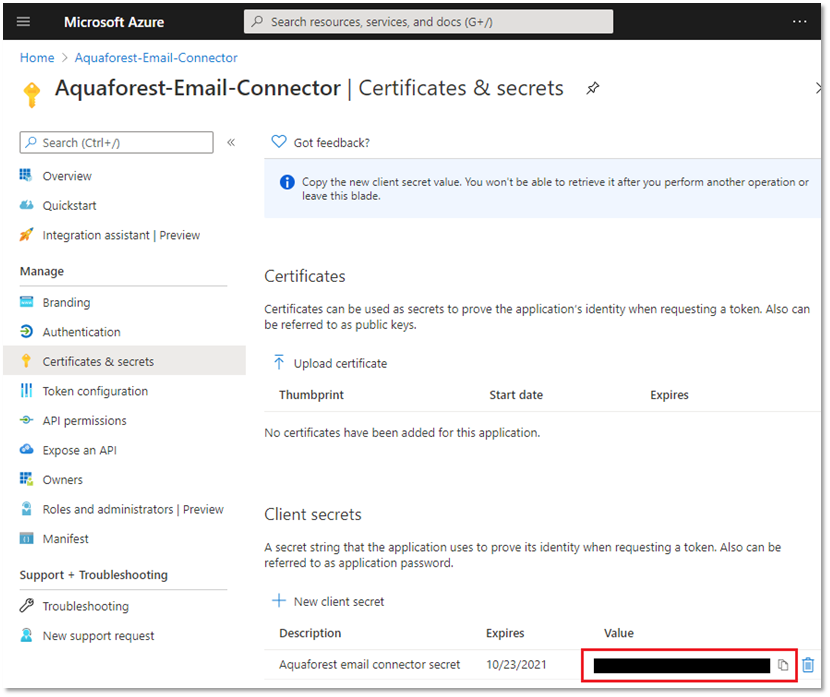
- Copy the client secret and keep it in a safe place. You will not be able to access it again after you leave the portal. The client secret will need to be supplied to the Aquaforest application.
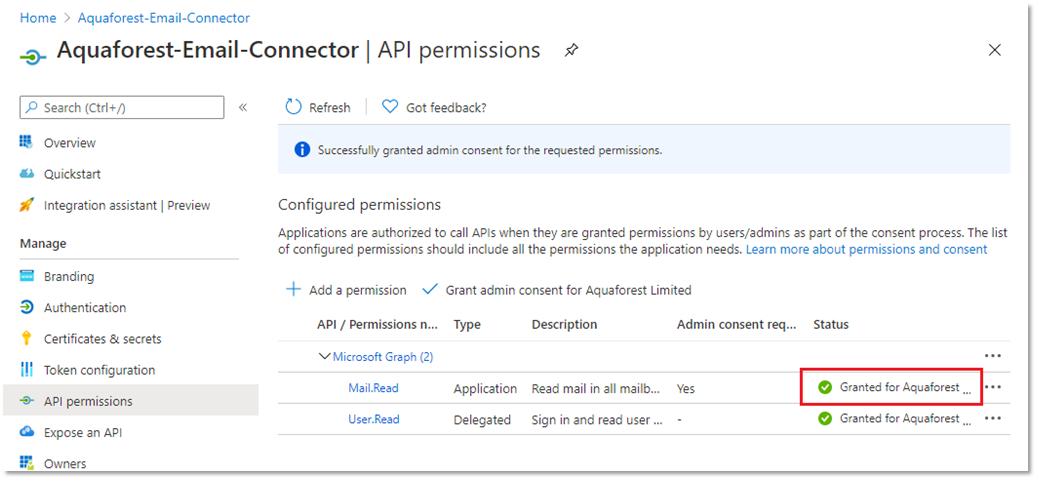
1.3 Configure API permissions
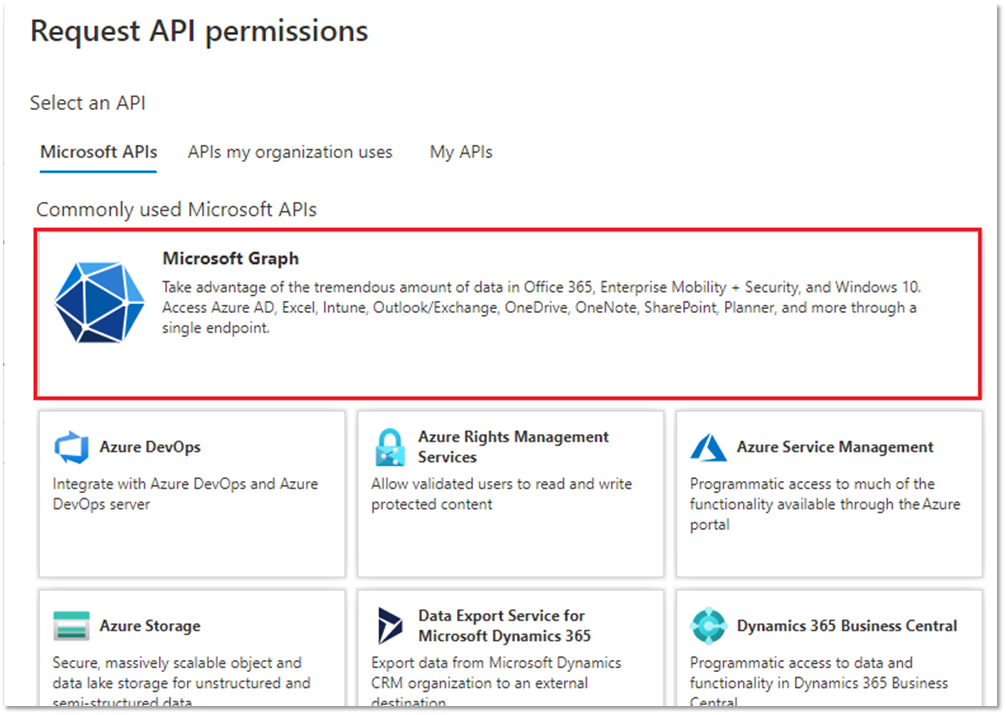
- On the API permissions page, select Add a permission
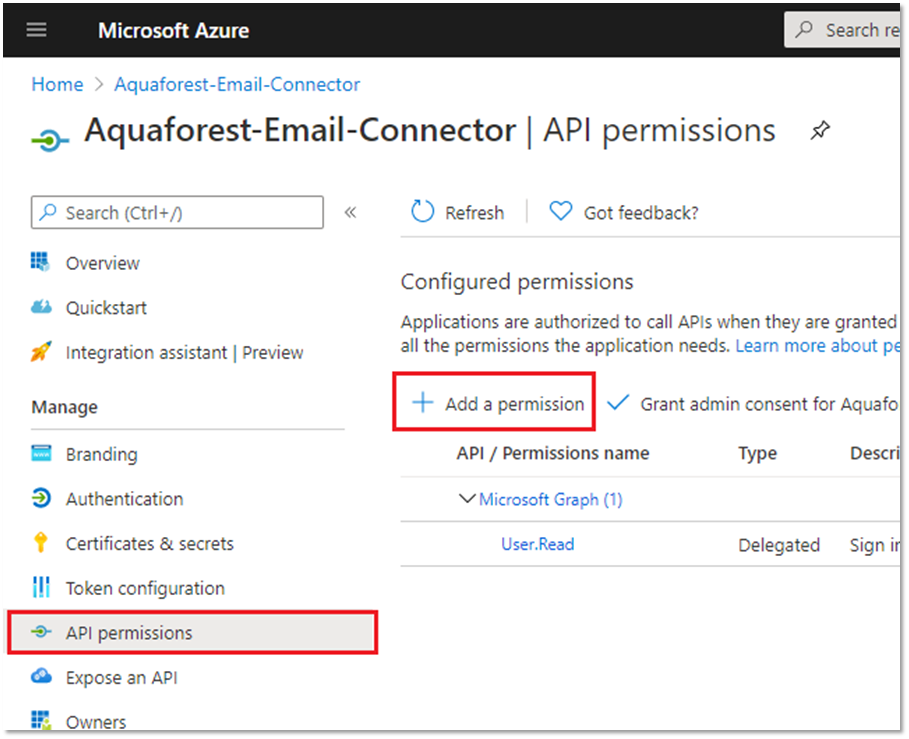
- Select Microsoft Graph

- Under Application Permissions, choose the mail permissions that the Aquaforest application
requires to perform on behalf of a user in Exchange Online (as part of Office 365). Under the Mail section, add the permissions the application requires:- If the Aquaforest application needs to send email, select the Mail.Send permission
- If the Aquaforest application needs to read email and read the attachments in the email, select the Mail.Read permission
- If the Aquaforest application needs to move emails from one folder to another (e.g. from Inbox to Deleted Items), select the Mail.ReadWrite permission
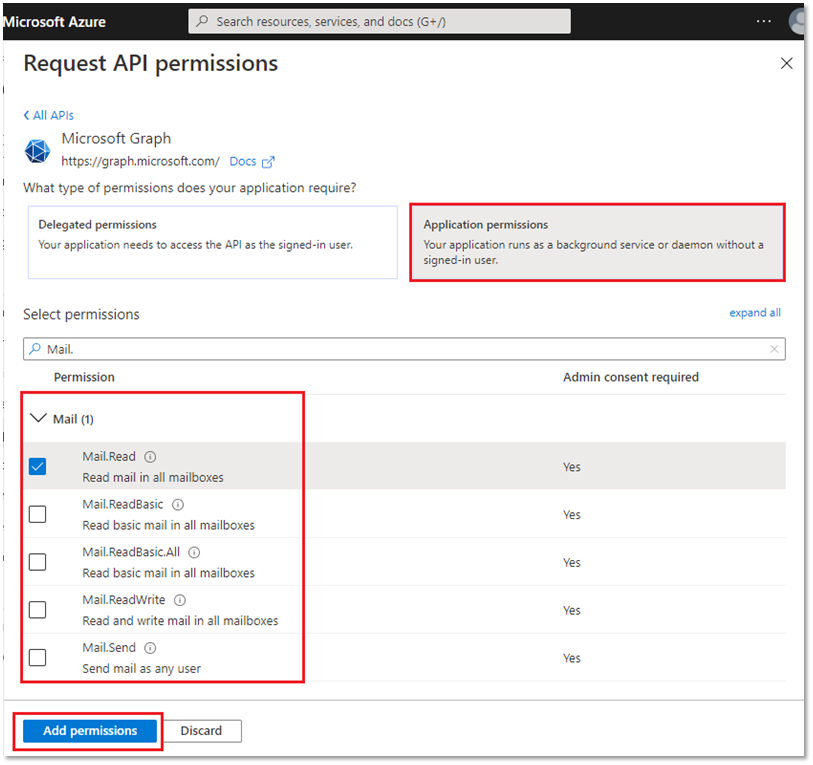
- Select Add permissions
- Someone with Administrator privileges must then grant the selected permissions by selecting Grant admin consent for <Tenant>
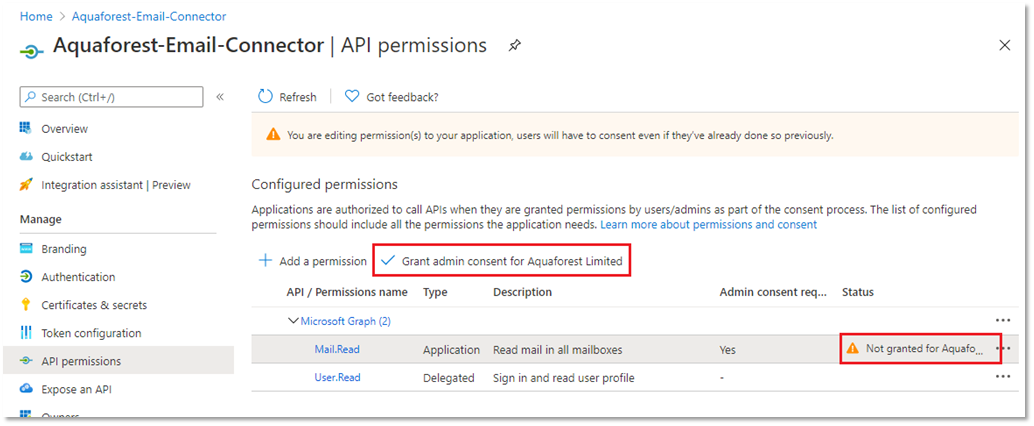
- Select Yes on the popup panel to grant the permissions