Legal document review requires a collaborative approach, presenting challenges in accuracy, clarity, and efficiency. In this article, we uncover the hurdles faced by legal professionals—from seamless collaboration to precise annotations. Introducing the SharePoint PDF Editor, a transformative solution designed to streamline annotating, reviewing, and collaboration in legal document management. Join us as we reveal the benefits, offer a step-by-step guide, and showcase the diverse annotation tools, elevating the legal document review process.
Challenges in Legal Document Review
Legal document review comes with its set of challenges, from the meticulous scrutiny required for accuracy to the necessity for seamless collaboration among legal professionals. Traditional methods often lead to time-consuming processes, version control issues, and difficulties in maintaining a standardized approach to annotations. The need for an efficient, collaborative, and secure solution is apparent.
Solution: SharePoint PDF Editor for Legal Document Collaboration
The PDF Editor for SharePoint emerges as a transformative solution, providing legal professionals with a comprehensive set of annotation tools tailored to the specific demands of legal document review. This tool streamlines collaboration, ensuring that every team member is on the same page, both figuratively and literally. With the ability to add links, comments (notes), shape annotations, highlight, and stamps, the PDF Editor becomes an indispensable asset in elevating the precision and efficiency of the legal document review process.
Benefits of Enhancing Collaboration with SharePoint PDF Editor
The benefits of incorporating the SharePoint PDF Editor into legal document review processes are multifaceted. Real-time collaboration enhances communication among team members, expediting decision-making processes. The diverse set of annotation tools ensures accuracy and clarity in document markup, fostering a more efficient and precise review. Additionally, the tool’s secure platform addresses privacy concerns, ensuring compliance with legal standards.
How to annotate PDF in SharePoint
Our PDF Editor for SharePoint lets you annotate and collaborate on documents in SharePoint Online and on-premises. Add sticky notes, comments, shapes, highlights, underlines, strikethroughs, and stamps. Customize the color, opacity, and thickness of your annotations. Automatically add user information for each new annotation to help track feedback in documents.
If you haven’t installed PDF Editor yet, you can get it here, on Microsoft App Source (Muhimbi is our sister company, as both Aquaforest and Muhimbi were acquired by PSPDFKit.) . If you need help with installation, check the video tutorial.
Step 1: Opening a PDF File
Go to the SharePoint library and click Upload to import a PDF from your computer, or select an existing PDF from the library.
Click Open from the dropdown menu and choose Open in PDF Editor.
Step 2: Add annotations to PDF
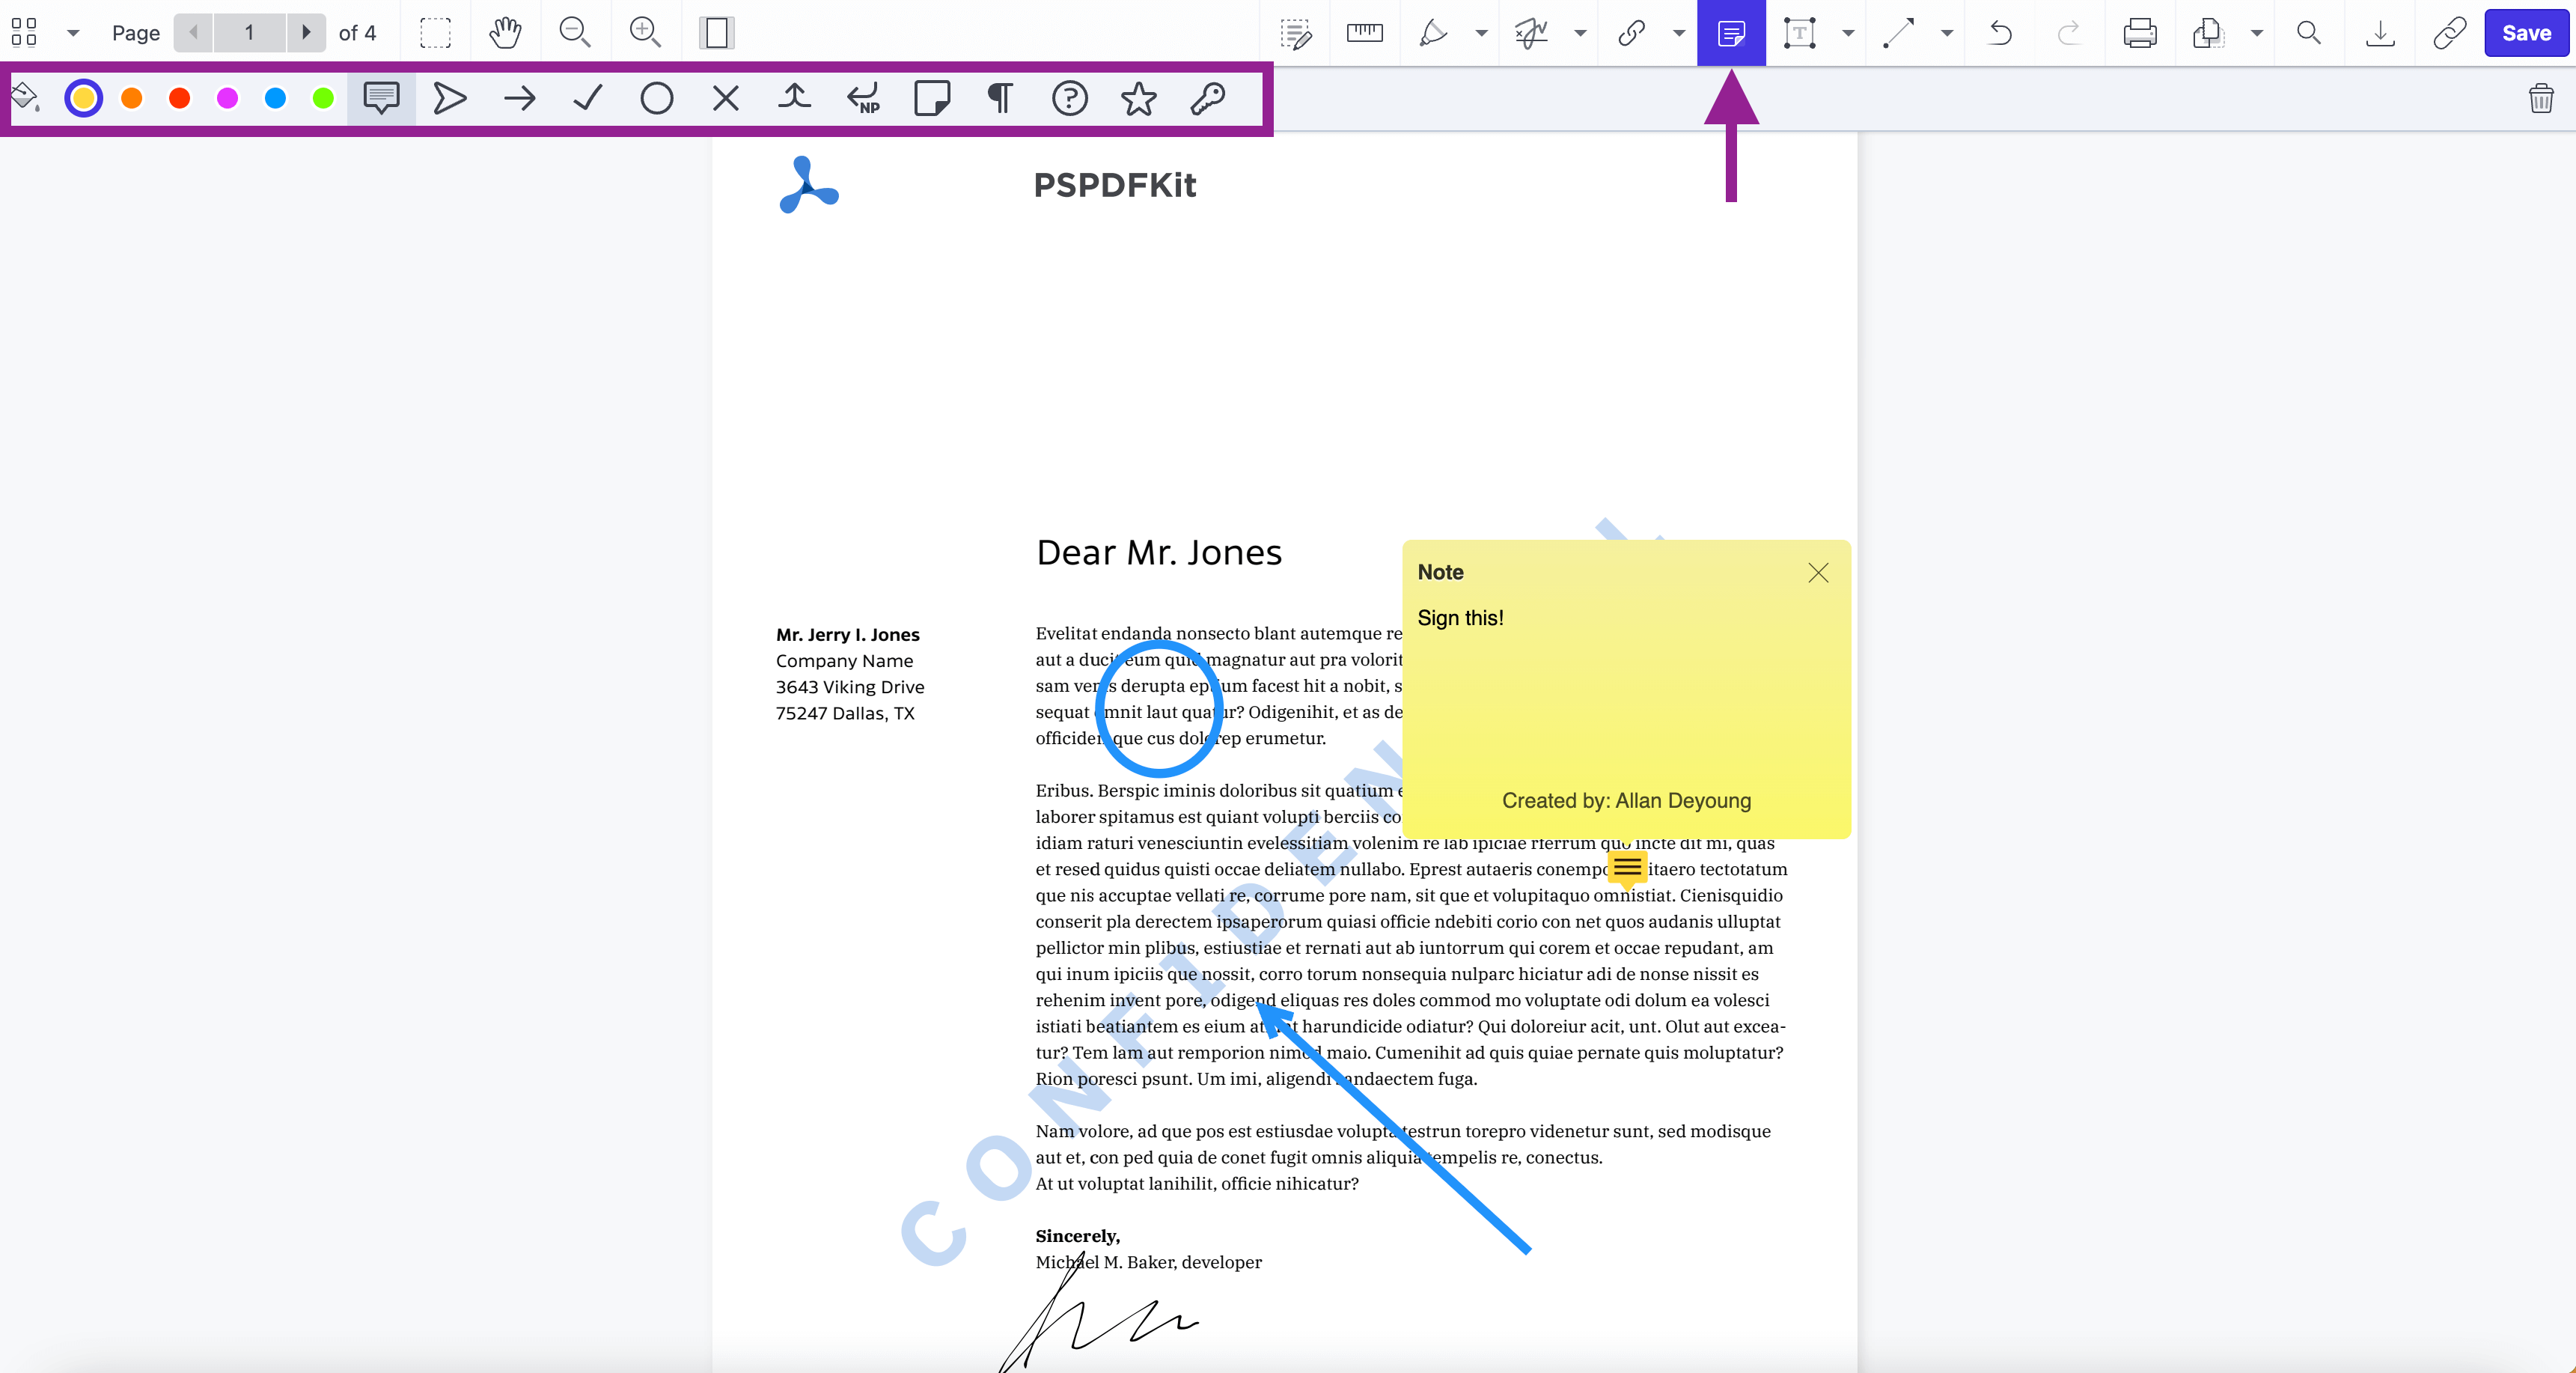
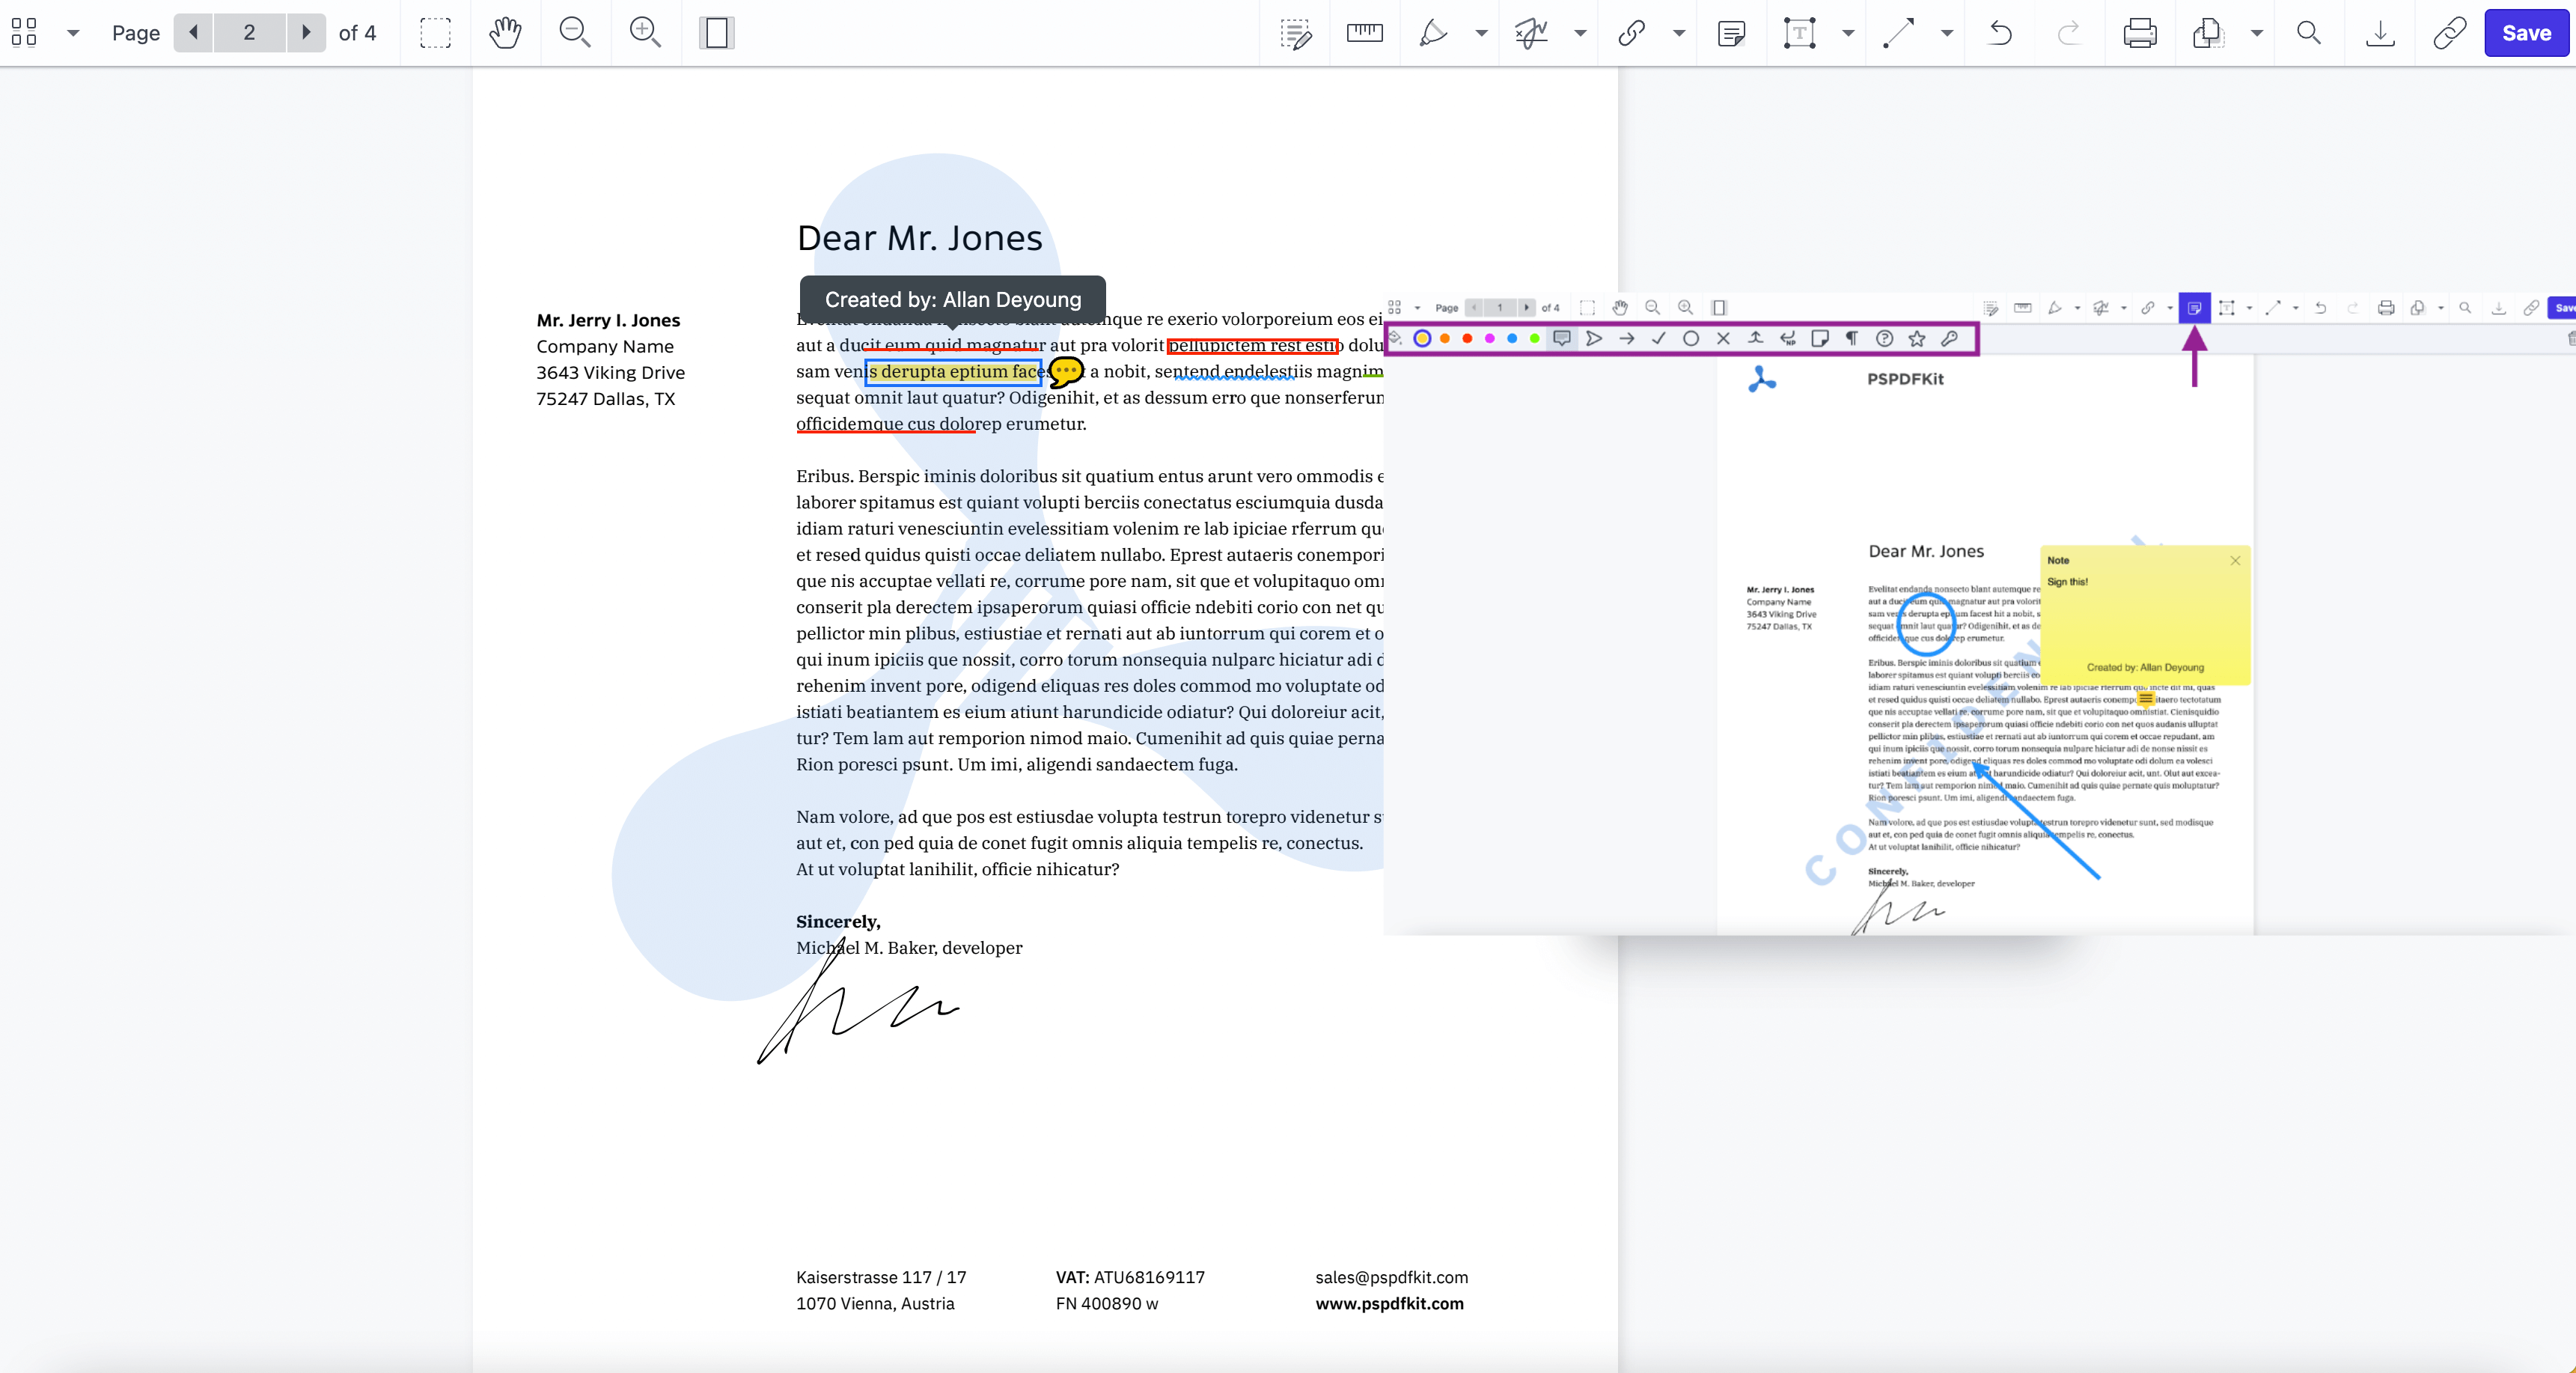
Adding Comments to PDFs
Open the PDF annotation tool by clicking the Note icon.
Select the exact area in the PDF document where you want to add comments and click to open the note field. Type the comment and close the dialog. The PDF annotation will be saved, and you can drag it to another place within the document.
In the top-left corner of the screen, there is a wide range of options to change the look of your annotations. The default color of the note field is yellow, but there are five other colors to choose from. You can also change the look of the icon of the closed annotation, depending on the type of comment added to the PDF document.
How to Stamp PDFs in SharePoint
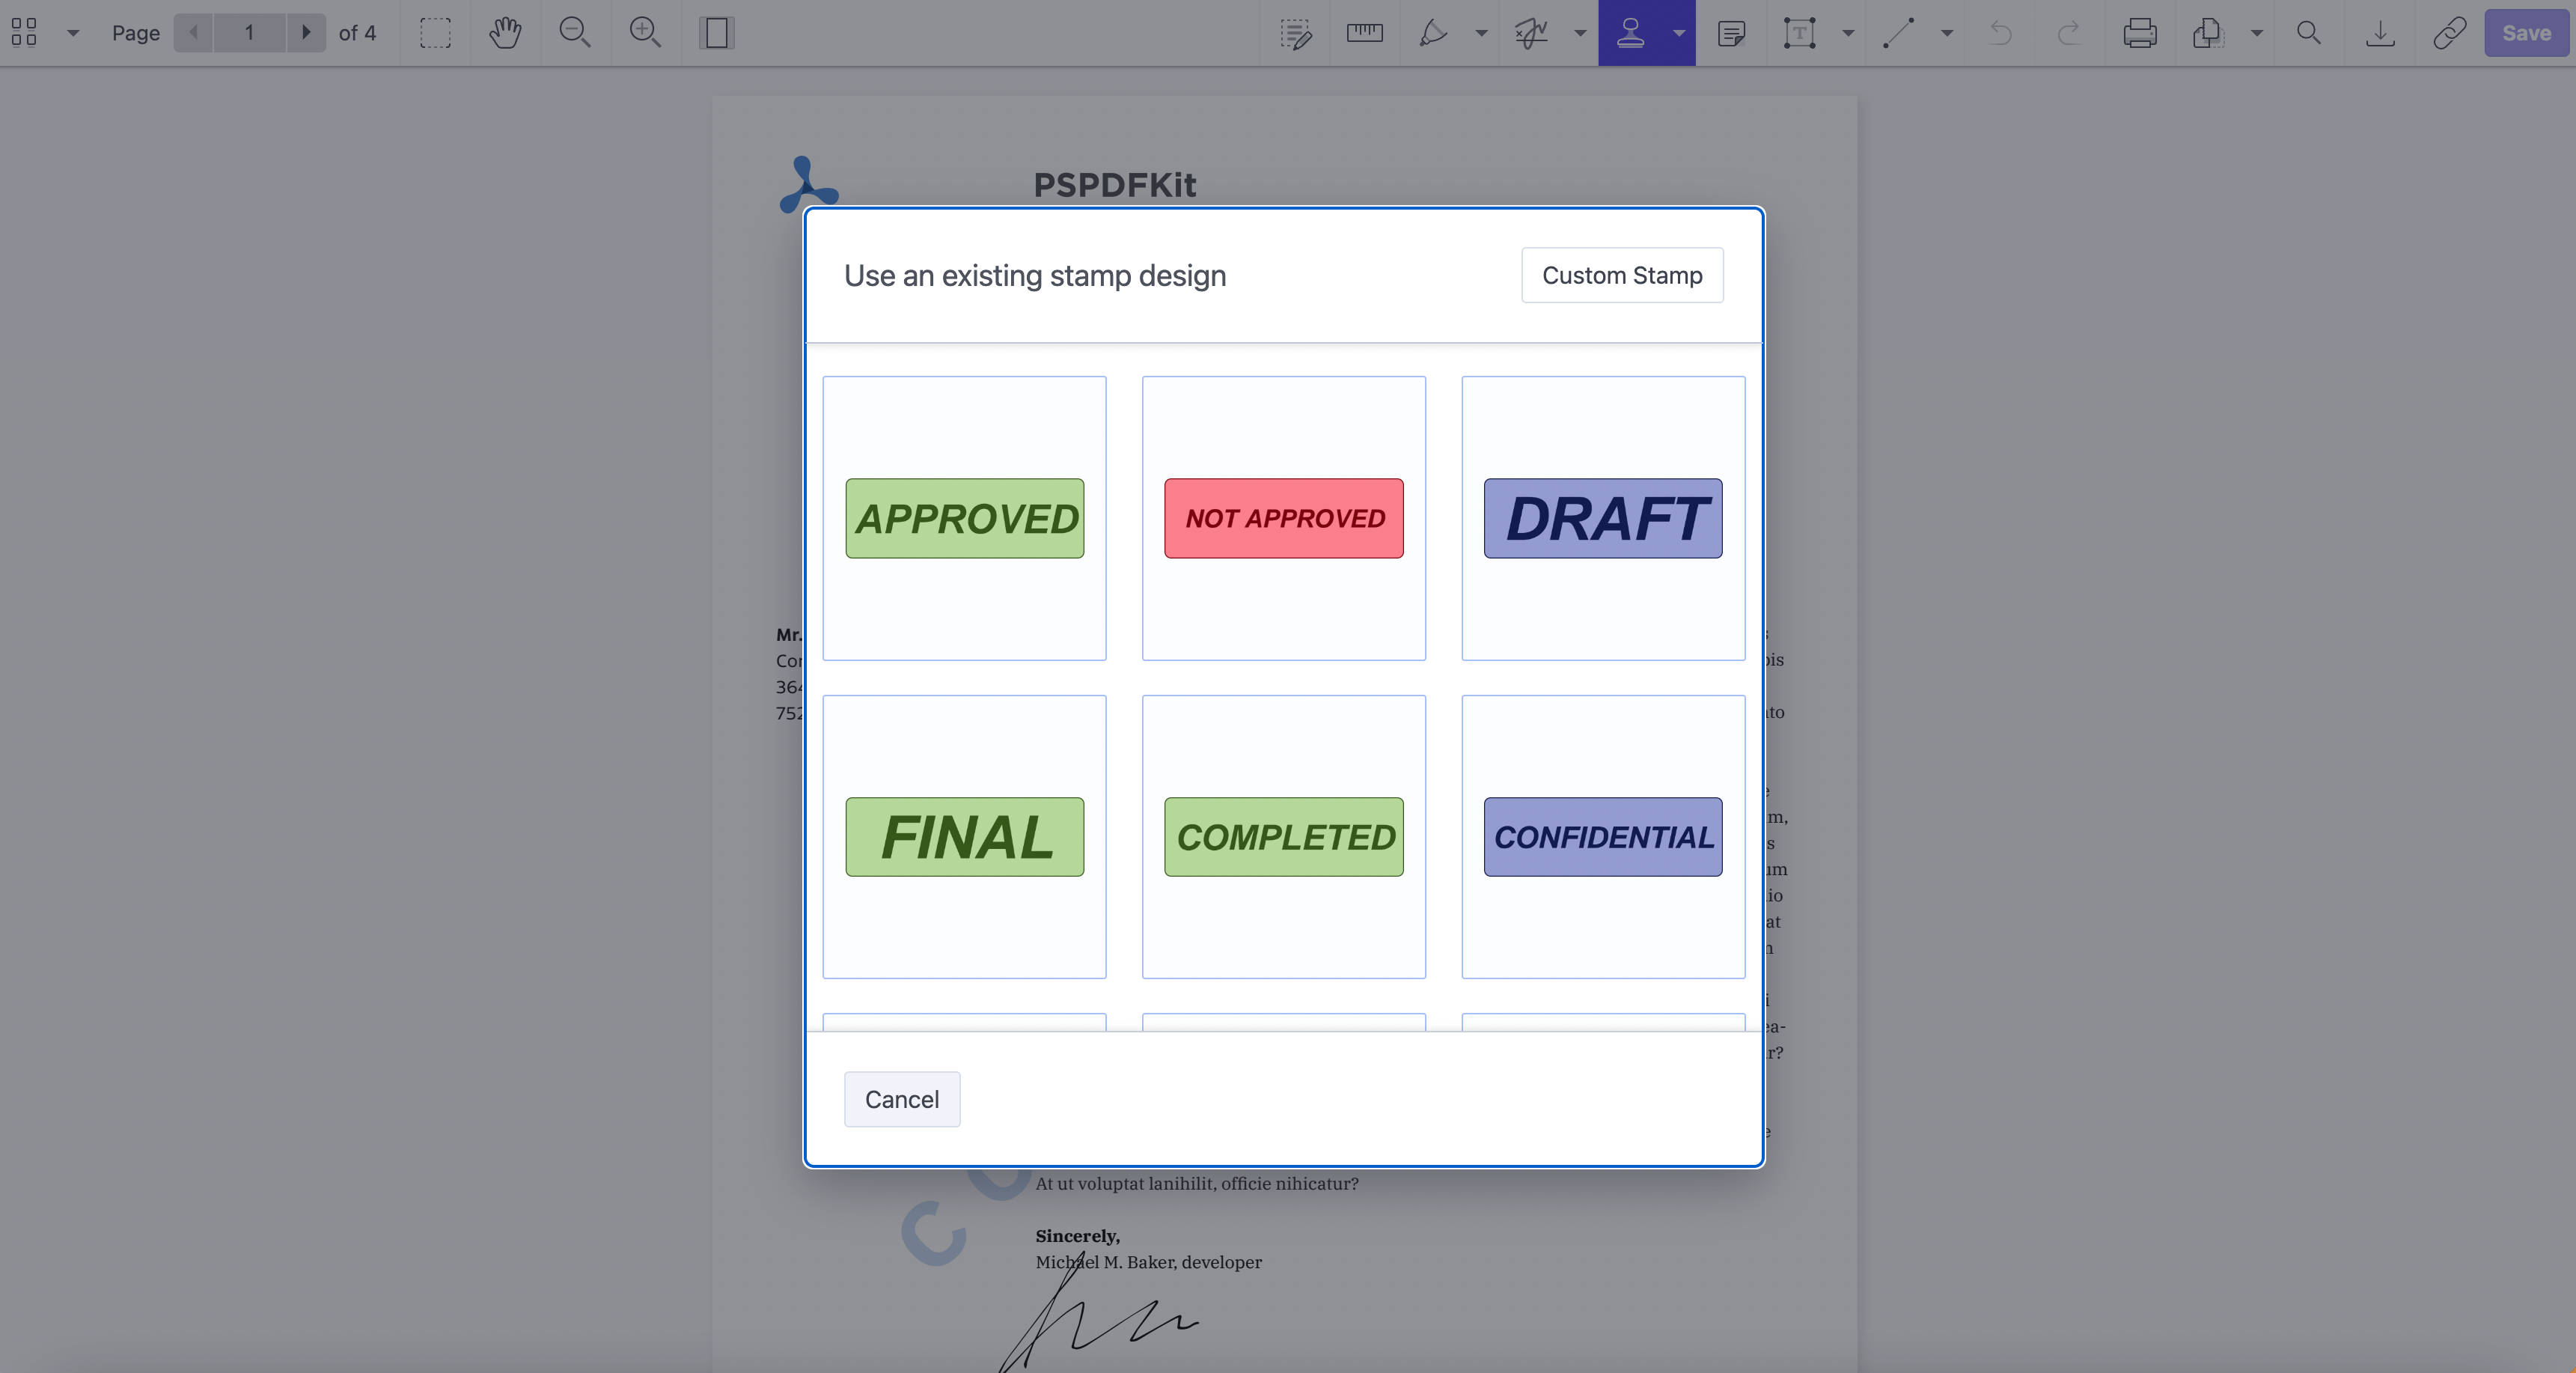
Click the dropdown menu next to the image icon and select Stamp.
Choose from 25 different PDF stamps. The stamp will automatically be placed on the document.
Select Custom Stamp to start customizing a PDF stamp. In the Stamp Text field, you can enter text and untick the boxes if you don’t want to include the time or date on the stamp.
Choose the color of the stamp and click Create Stamp to save your changes.
If you want to edit the look of the stamp, select it and then change its opacity by pulling the percentage bar to the left. This additional setting is visible in the top-left corner once you click the PDF stamp.
You can also add a comment to the PDF stamp by selecting the stamp and then clicking the Note icon in the top-right corner.
Next to the Note icon is the Delete button, which can be used to delete the stamp.
You can also change the size and the position of the PDF stamp. Click the border dots and pull them in different directions to resize the stamp. If you want to move the stamp, select it, and once you see a hand palm icon, drag and drop the stamp to a different place on the PDF page.
How to Add Shape Annotations to PDFs in SharePoint
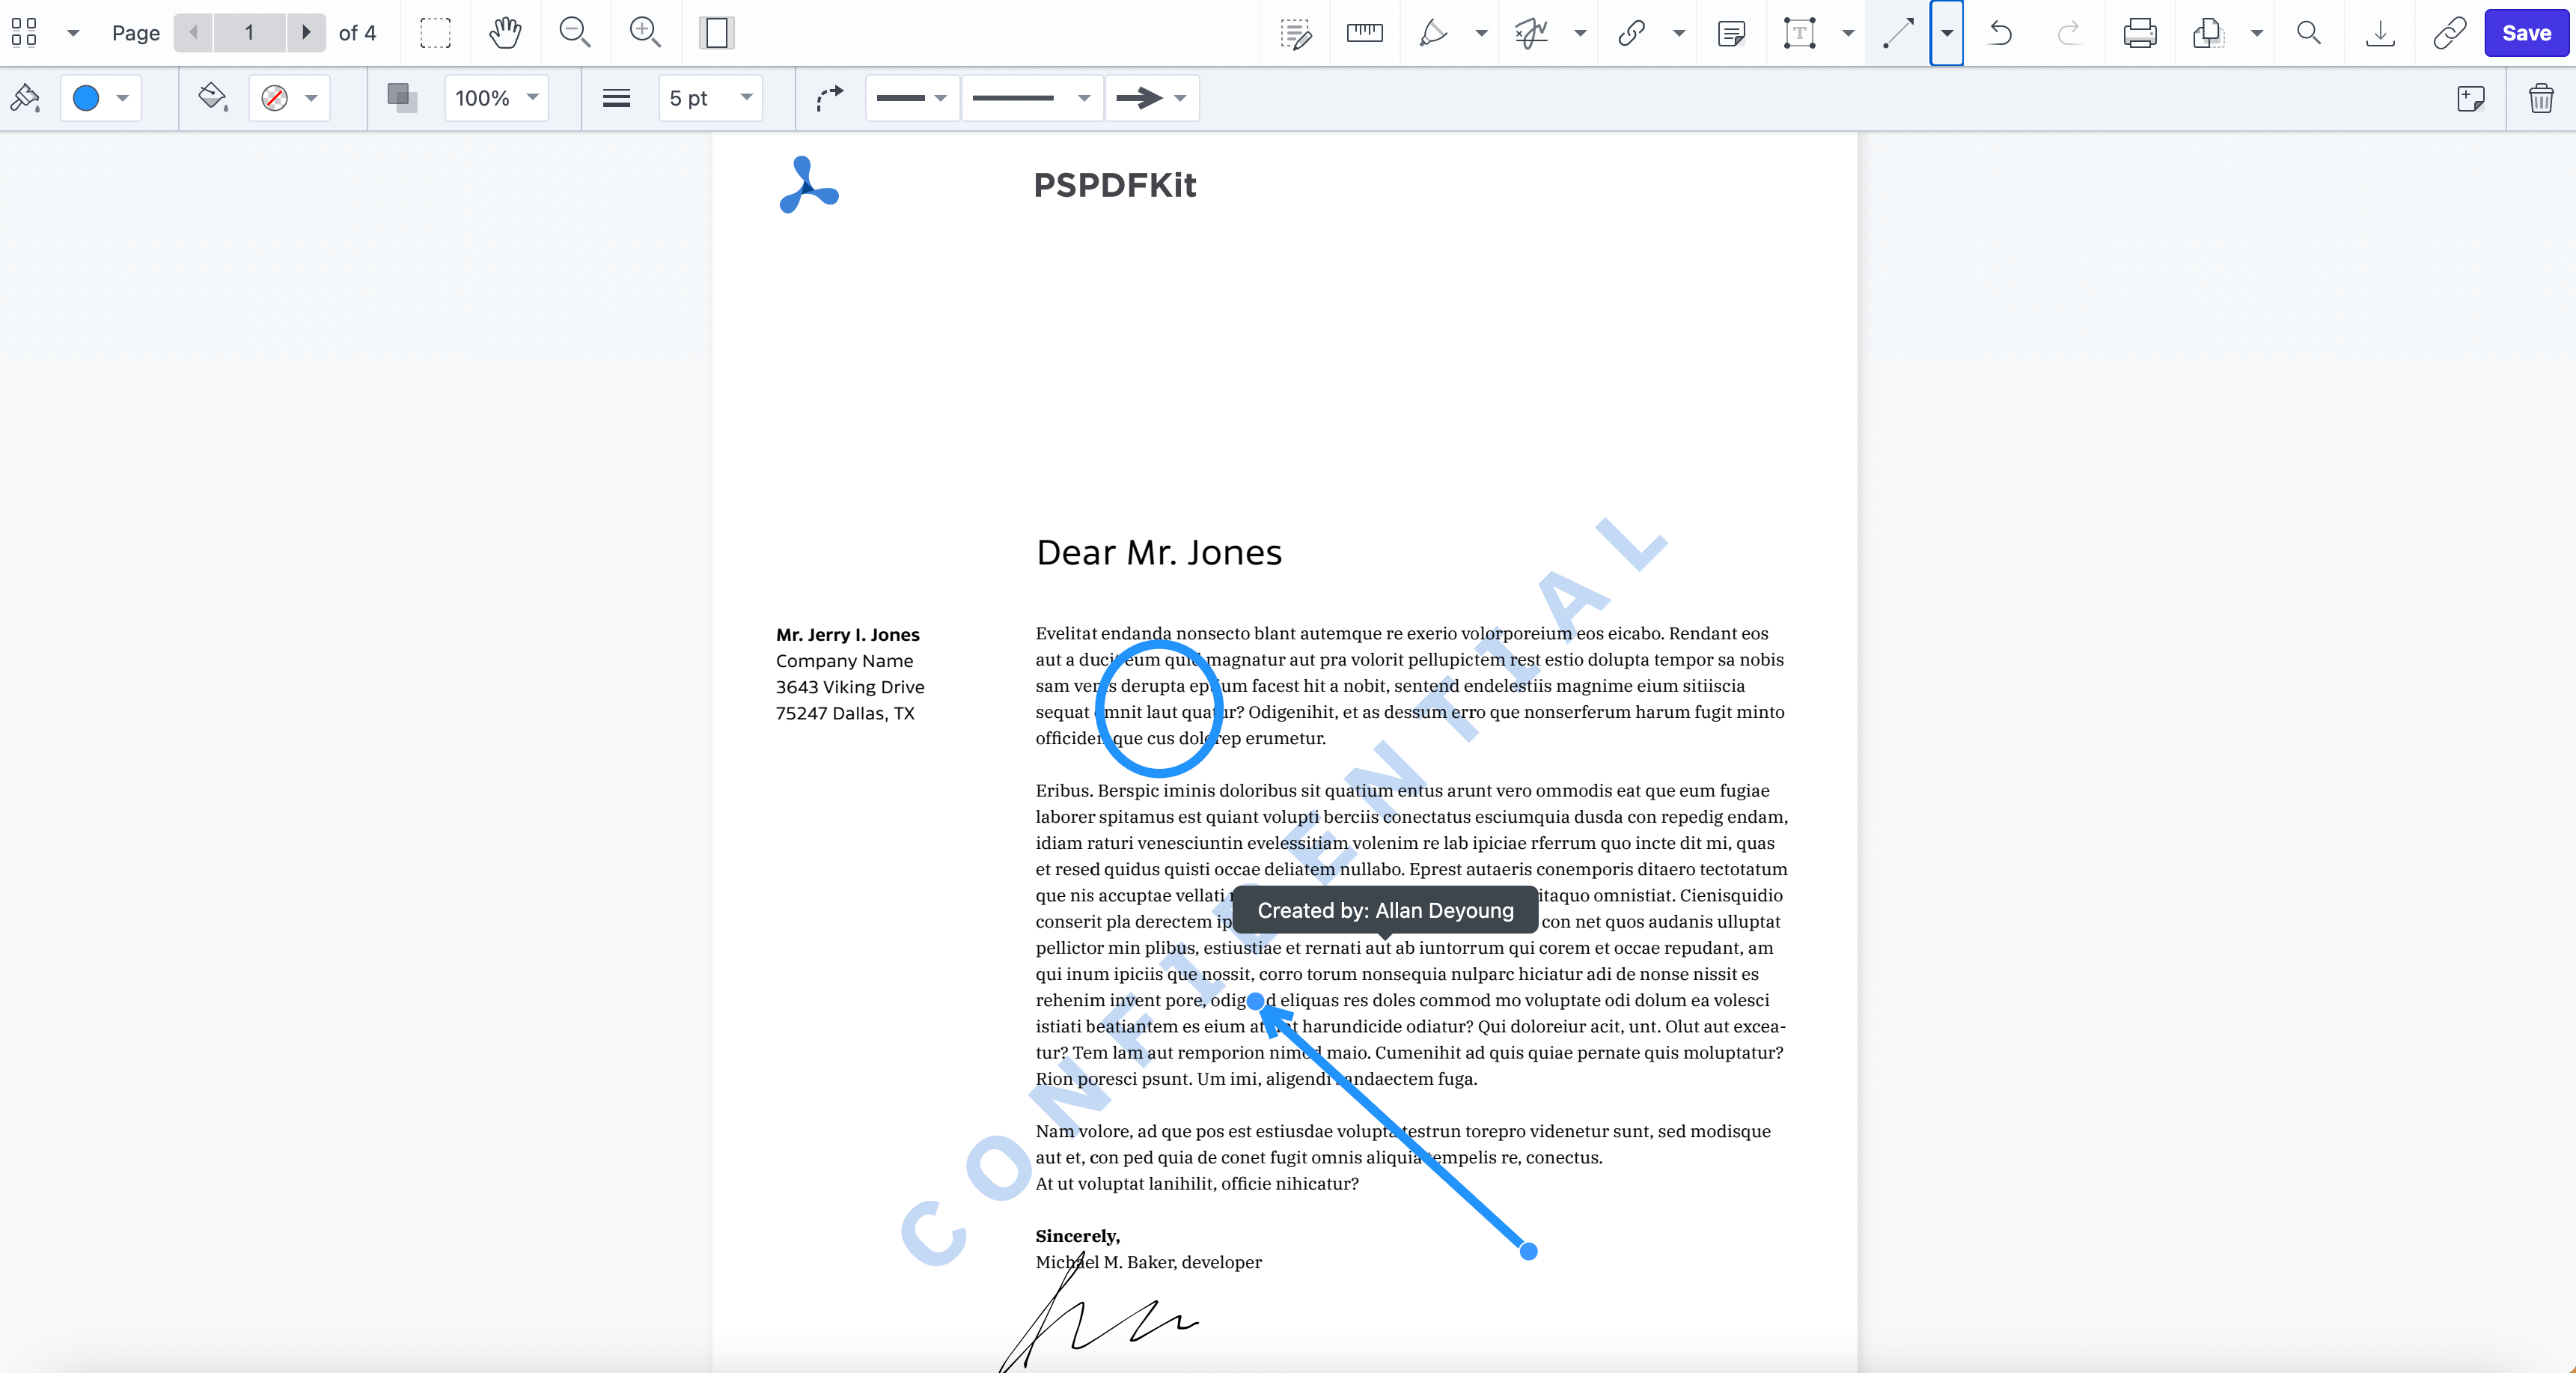
In the toolbar, next to the Text button, there’s a dropdown menu with different shape annotations. Choose your desired shape and drag the cursor in the preferred direction. For example, if you want to draw an ellipse annotation, the moving of your cursor should resemble the look of the ellipse.
You can also draw lines, polylines, arrows, rectangles, clouds, and polygon annotations.
For each type of shape annotation, you can change the color, fill color, opacity, thickness, and line style. There are six different line styles to choose from.
To delete a shape annotation, select it and then click the recycle bin icon in the top-left corner.
Highlighting Text in PDFs
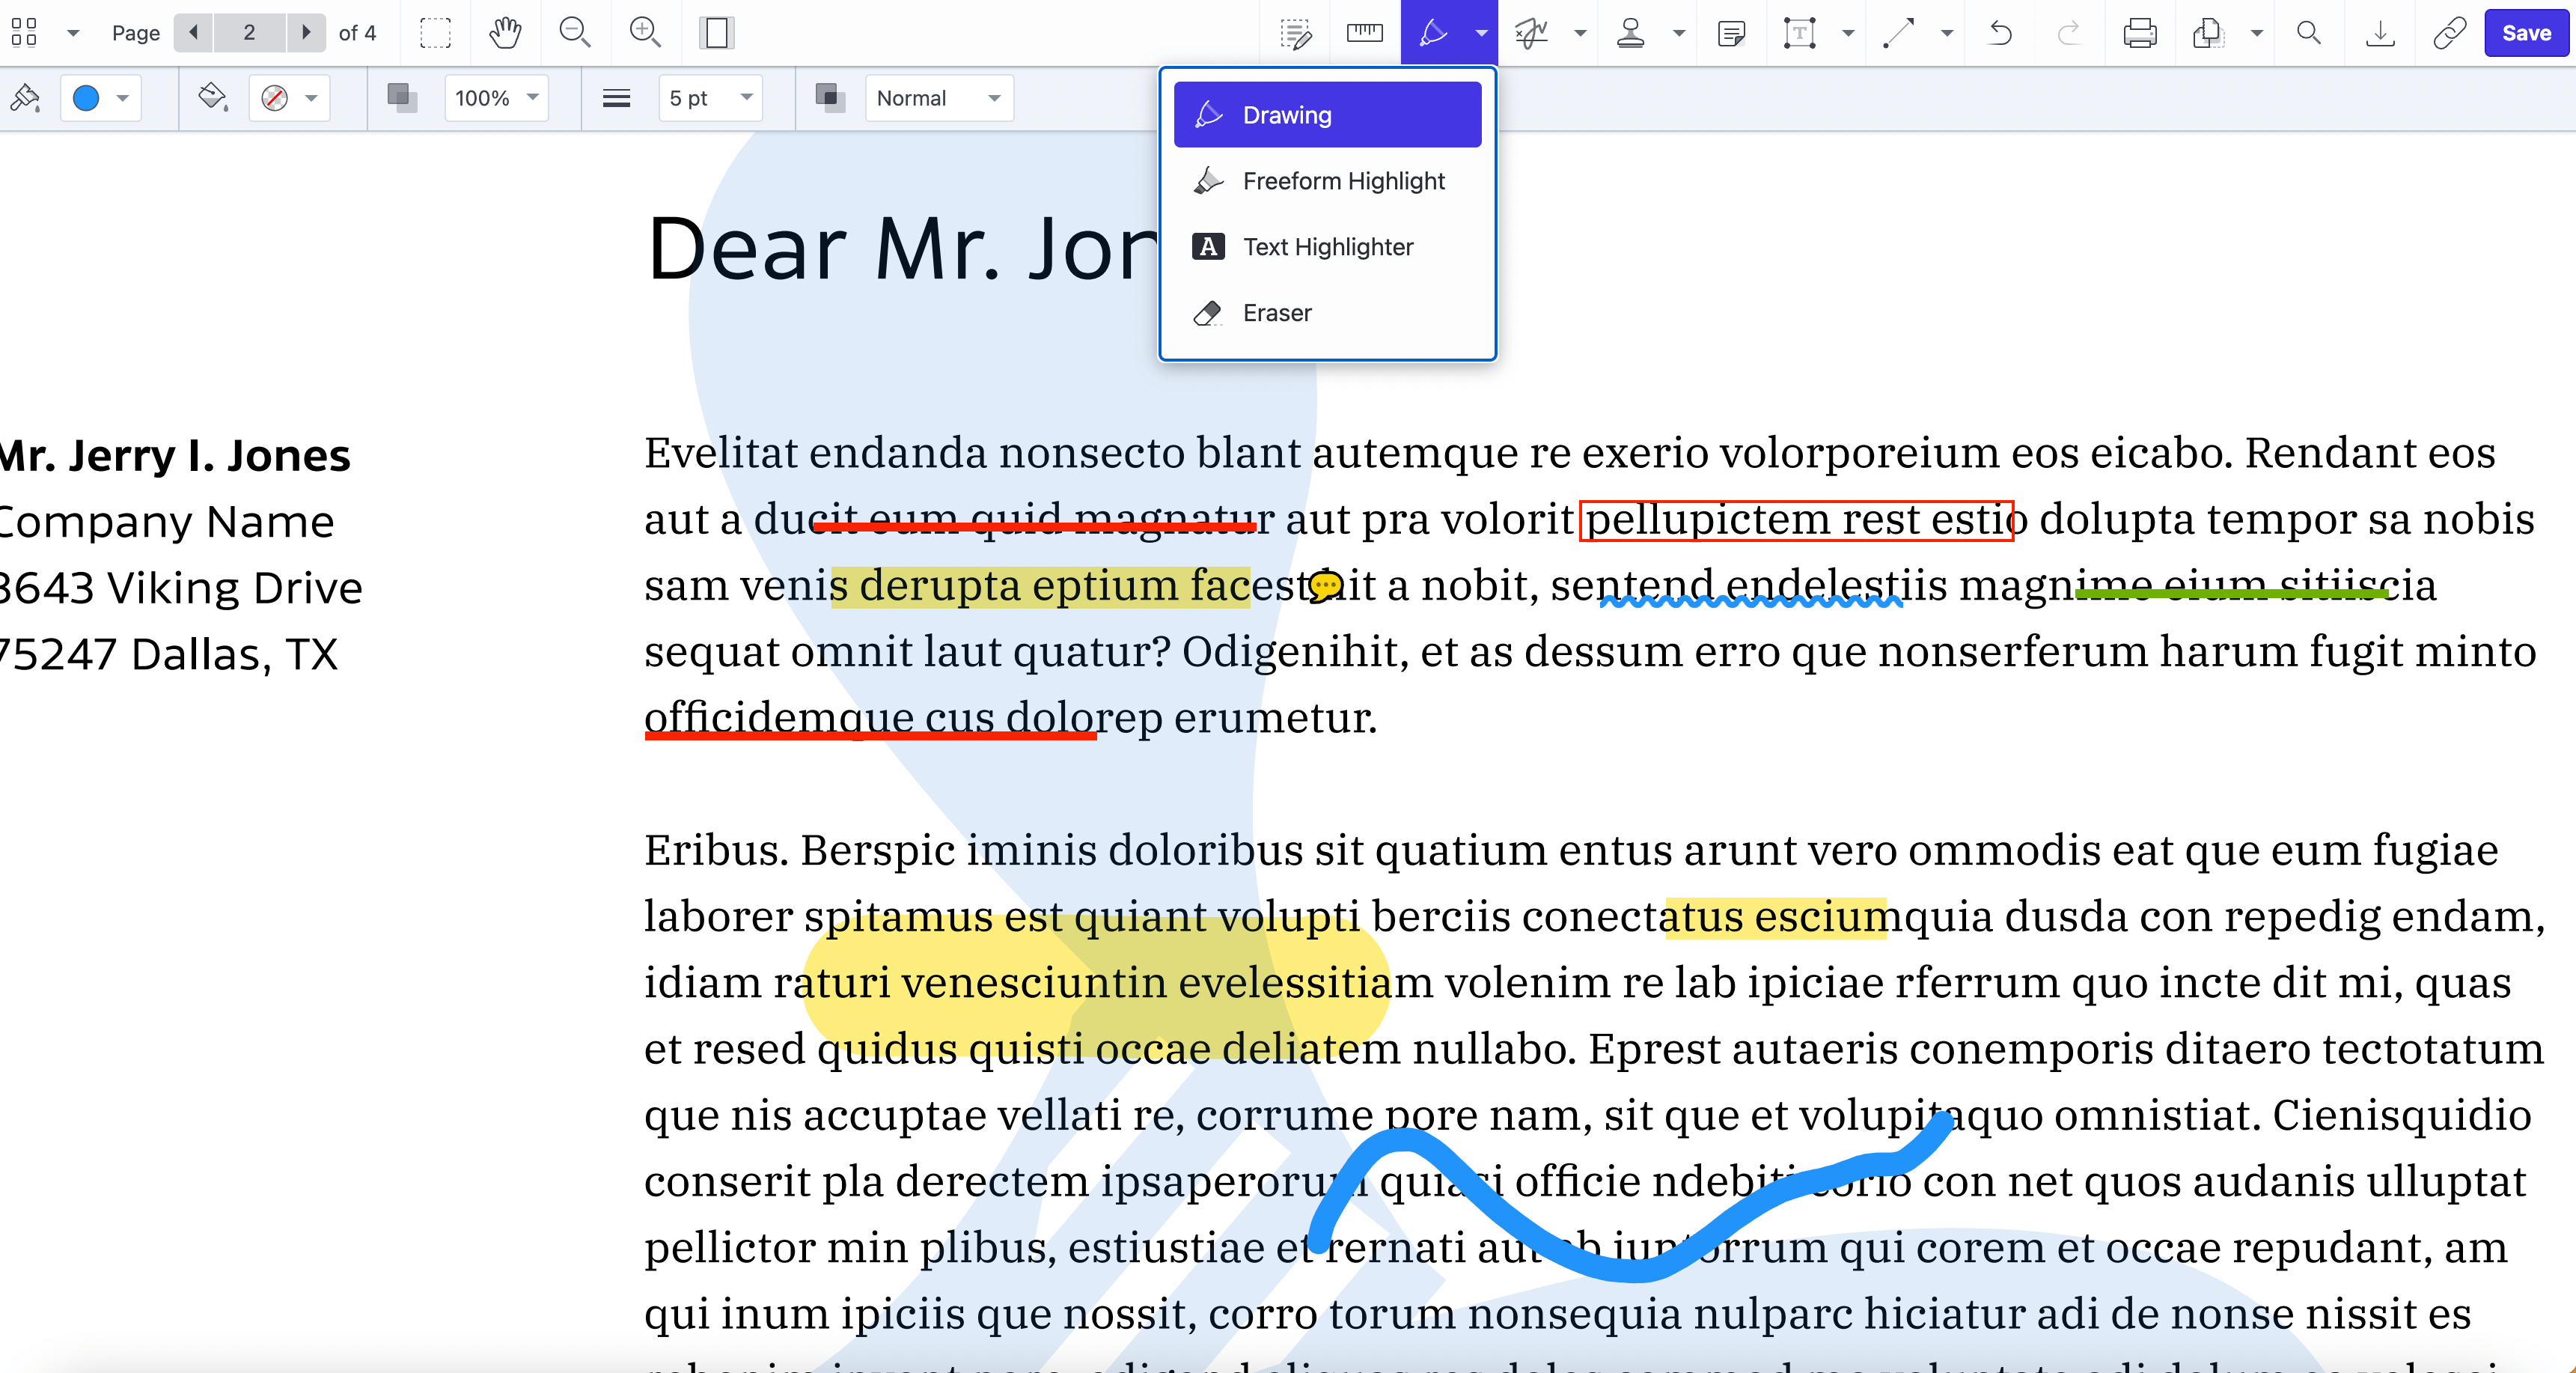
There are two ways to highlight text in PDF.
1. Click the third icon from the left in the top-right toolbar to select one of the following actions:
- Drawing
- Freeform Highlight (for highlighting any type of content, whether image or text)
- Text Highlight
- Eraser
2. Select a word, a phrase, or a sentence and the following actions will be available:
- Text Highlight
- Strikethrough
- Underline
- Squiggle
- Redaction
Depending on the type of annotation, some additional settings may show up in the top-left corner, where you can choose a different kind of font, size, and color. Once you perform the highlight text action, this left toolbar will show up where you can change the color of the highlight annotation.
How to Add Links to PDFs in SharePoint
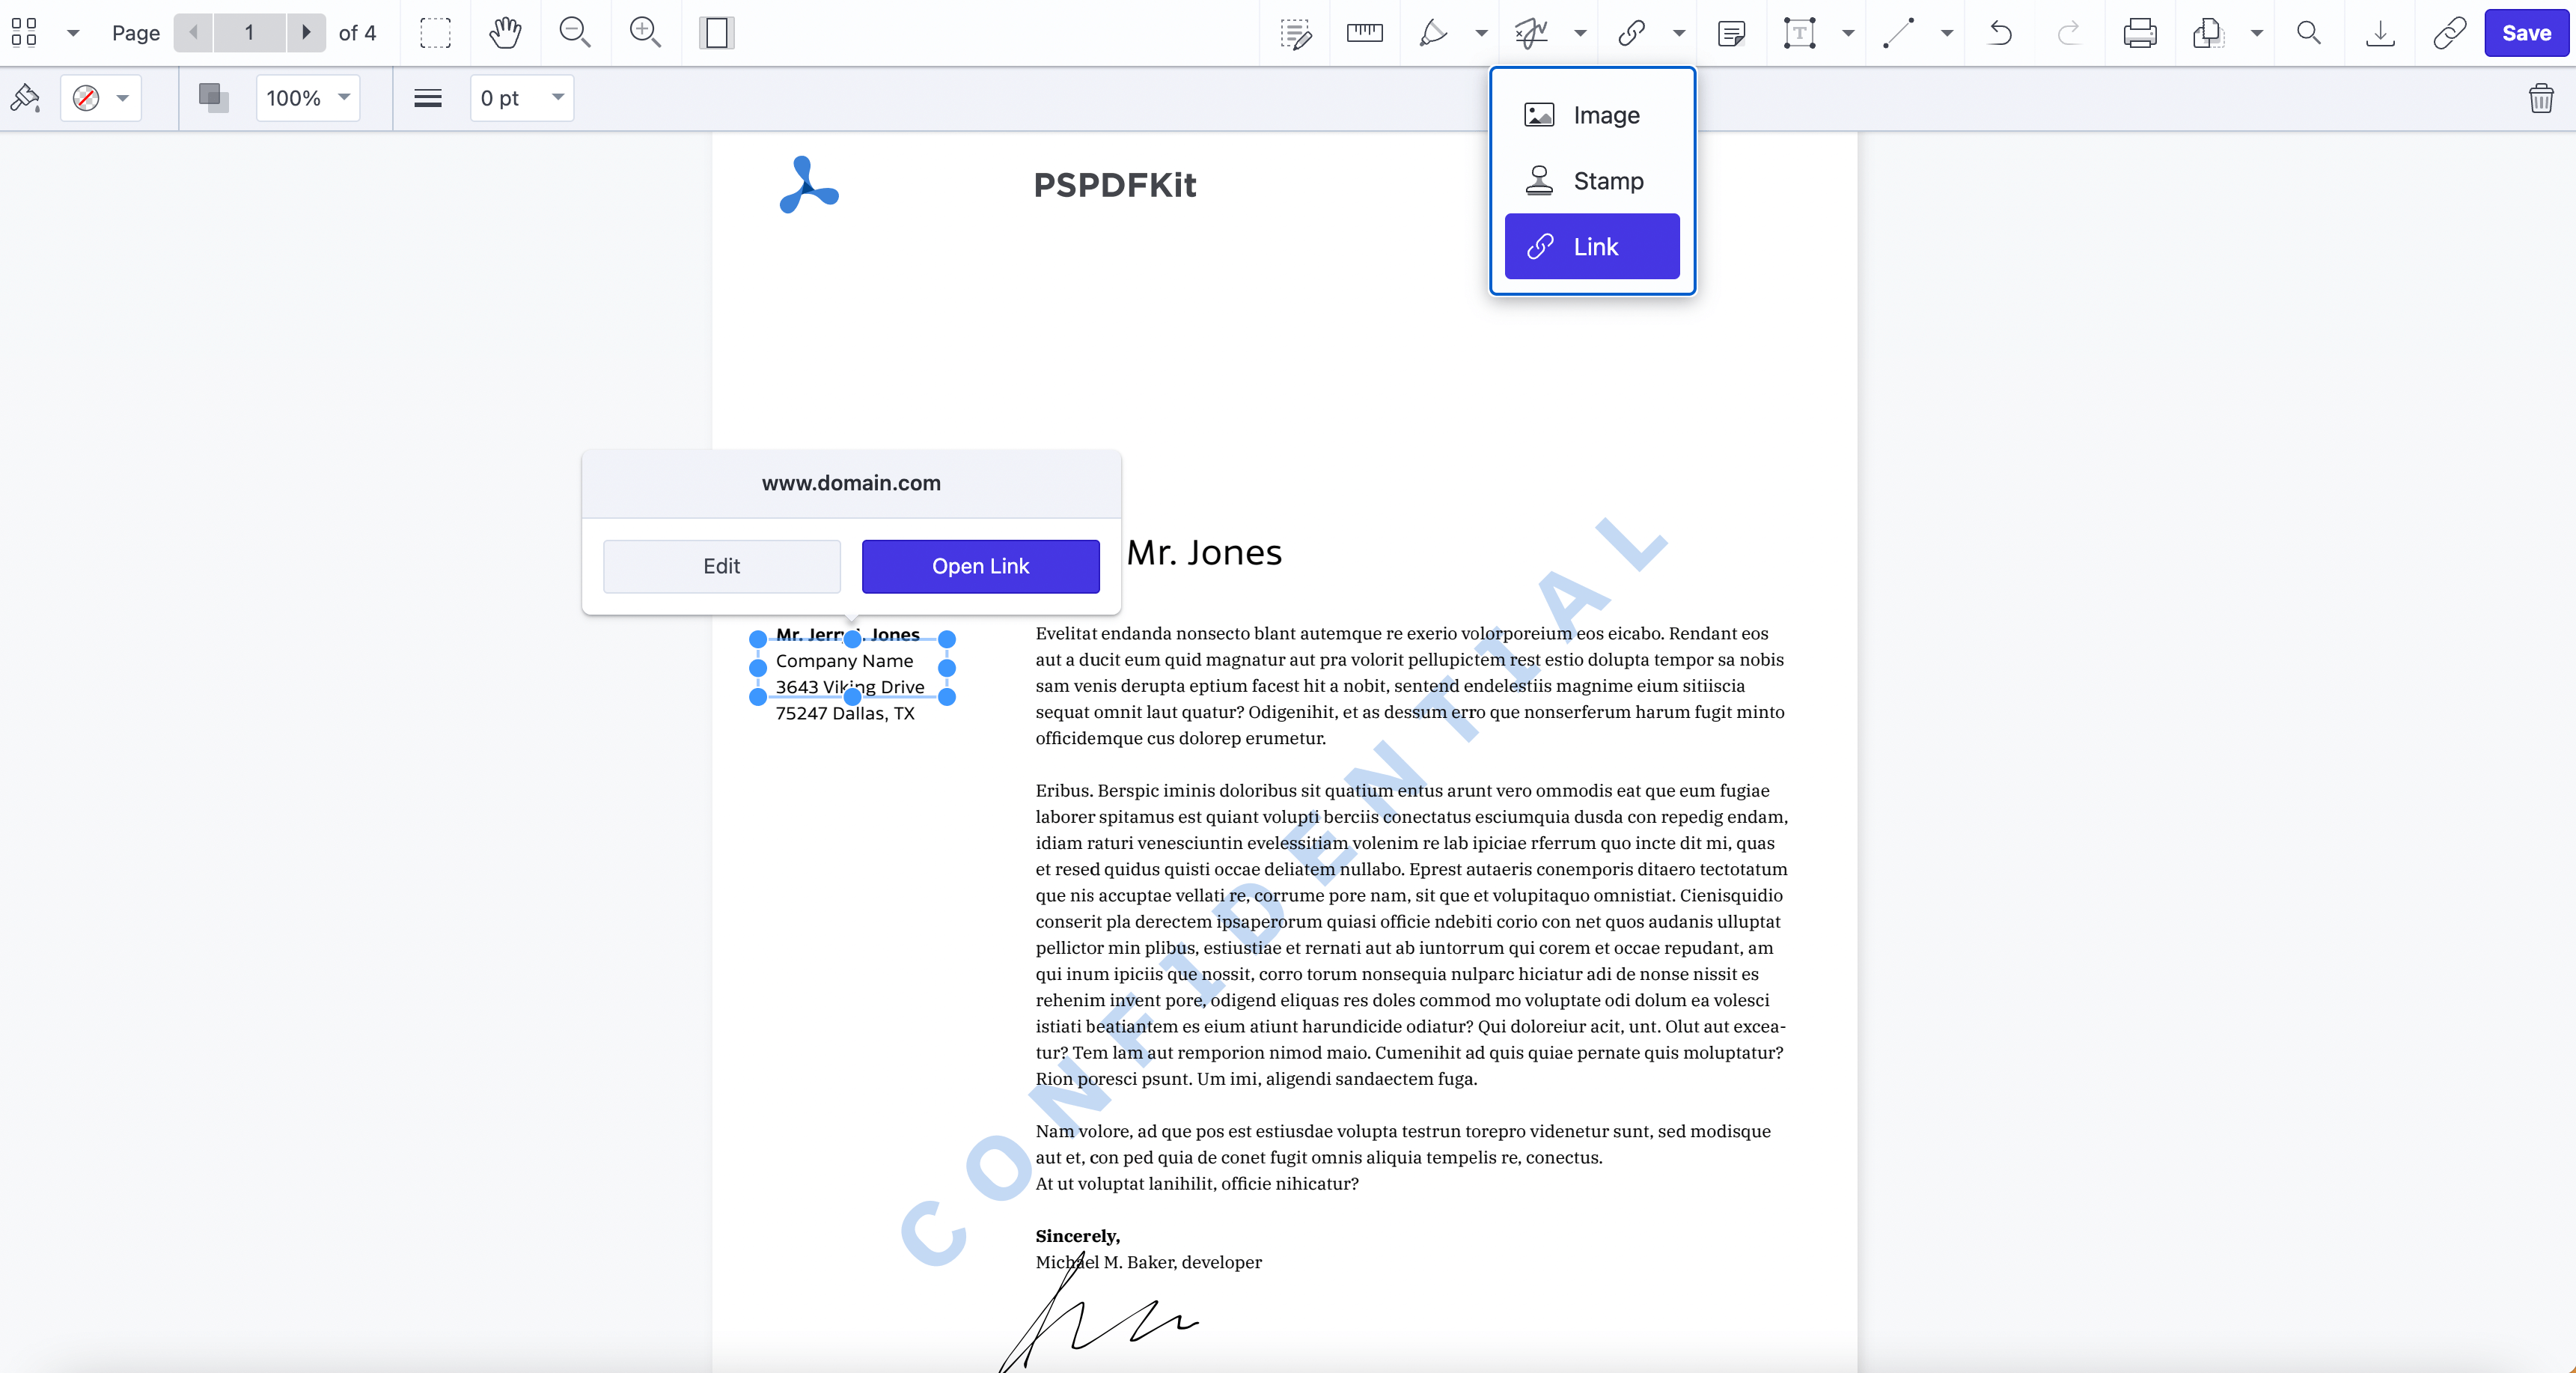
Click the arrow next to the image icon to open a dropdown menu, and choose the Link option.
Select the area in the document where you want to add a link, and hold the left mouse button to move the link annotation around.
The Link Settings window will pop up asking you to enter a website URL or a page in the document.
When the Link Settings window is open, additional settings will appear under the main toolbar. Choose a border color, the opacity percentage, and the thickness of the line. The link annotation can be a different color for better visibility.
You can move the link annotation anywhere on the page. In the top-right corner, click the recycle bin icon to delete the link from your PDF. You can also add a comment to the link by clicking the Note icon next to the recycle bin.
Finally, click Save to save the changes to your PDF document.
Conclusion
By addressing challenges in precision, collaboration, and efficiency, this tool not only transforms the way legal professionals review documents but also sets a new standard for accuracy and clarity in the legal landscape. Get instant access to PDF Editor in SharePoint by downloading it directly from Microsoft AppSource. See how you can easily edit, sign, redact, and annotate PDF files in SharePoint.