
In today’s fast-paced business environment, managing expenses and tracking receipts can be a tedious task. This user guide explores how Optical Character Recognition (OCR) technology, specifically the Aquaforest PDF Connector for Power Automate’s “OCR PDF or images” action, can simplify expense tracking by automating the extraction of information from scanned receipts.
Use Case Story: Automated Receipt Recognition
John’s Expense Woes
Meet John, a busy professional who often finds himself drowning in a sea of paper receipts. Manually entering data for expense tracking not only consumes a significant amount of his time but also introduces the risk of errors.
OCR Receipt Recognition for Expense Tracking
John discovers the power of OCR in Power Automate through the Aquaforest PDF Connector. By implementing the “OCR PDF or images” action, he can now automate the extraction of vital information from scanned receipts.
Time Efficiency: OCR eliminates the need for manual data entry, saving time and allowing professionals like John to focus on more strategic tasks.
Accuracy Improvement: Automated receipt recognition reduces the risk of errors associated with manual data entry, ensuring accurate expense tracking.
Streamlined Processes: OCR technology streamlines the entire expense tracking process, from receipt scanning to data extraction, enhancing overall workflow efficiency.
Real-time Accessibility: Digitized data from OCR becomes instantly accessible, enabling quick retrieval and reference for reimbursement processes.
Follow these step-by-step instructions to implement the “OCR PDF or images” action for expense tracking:
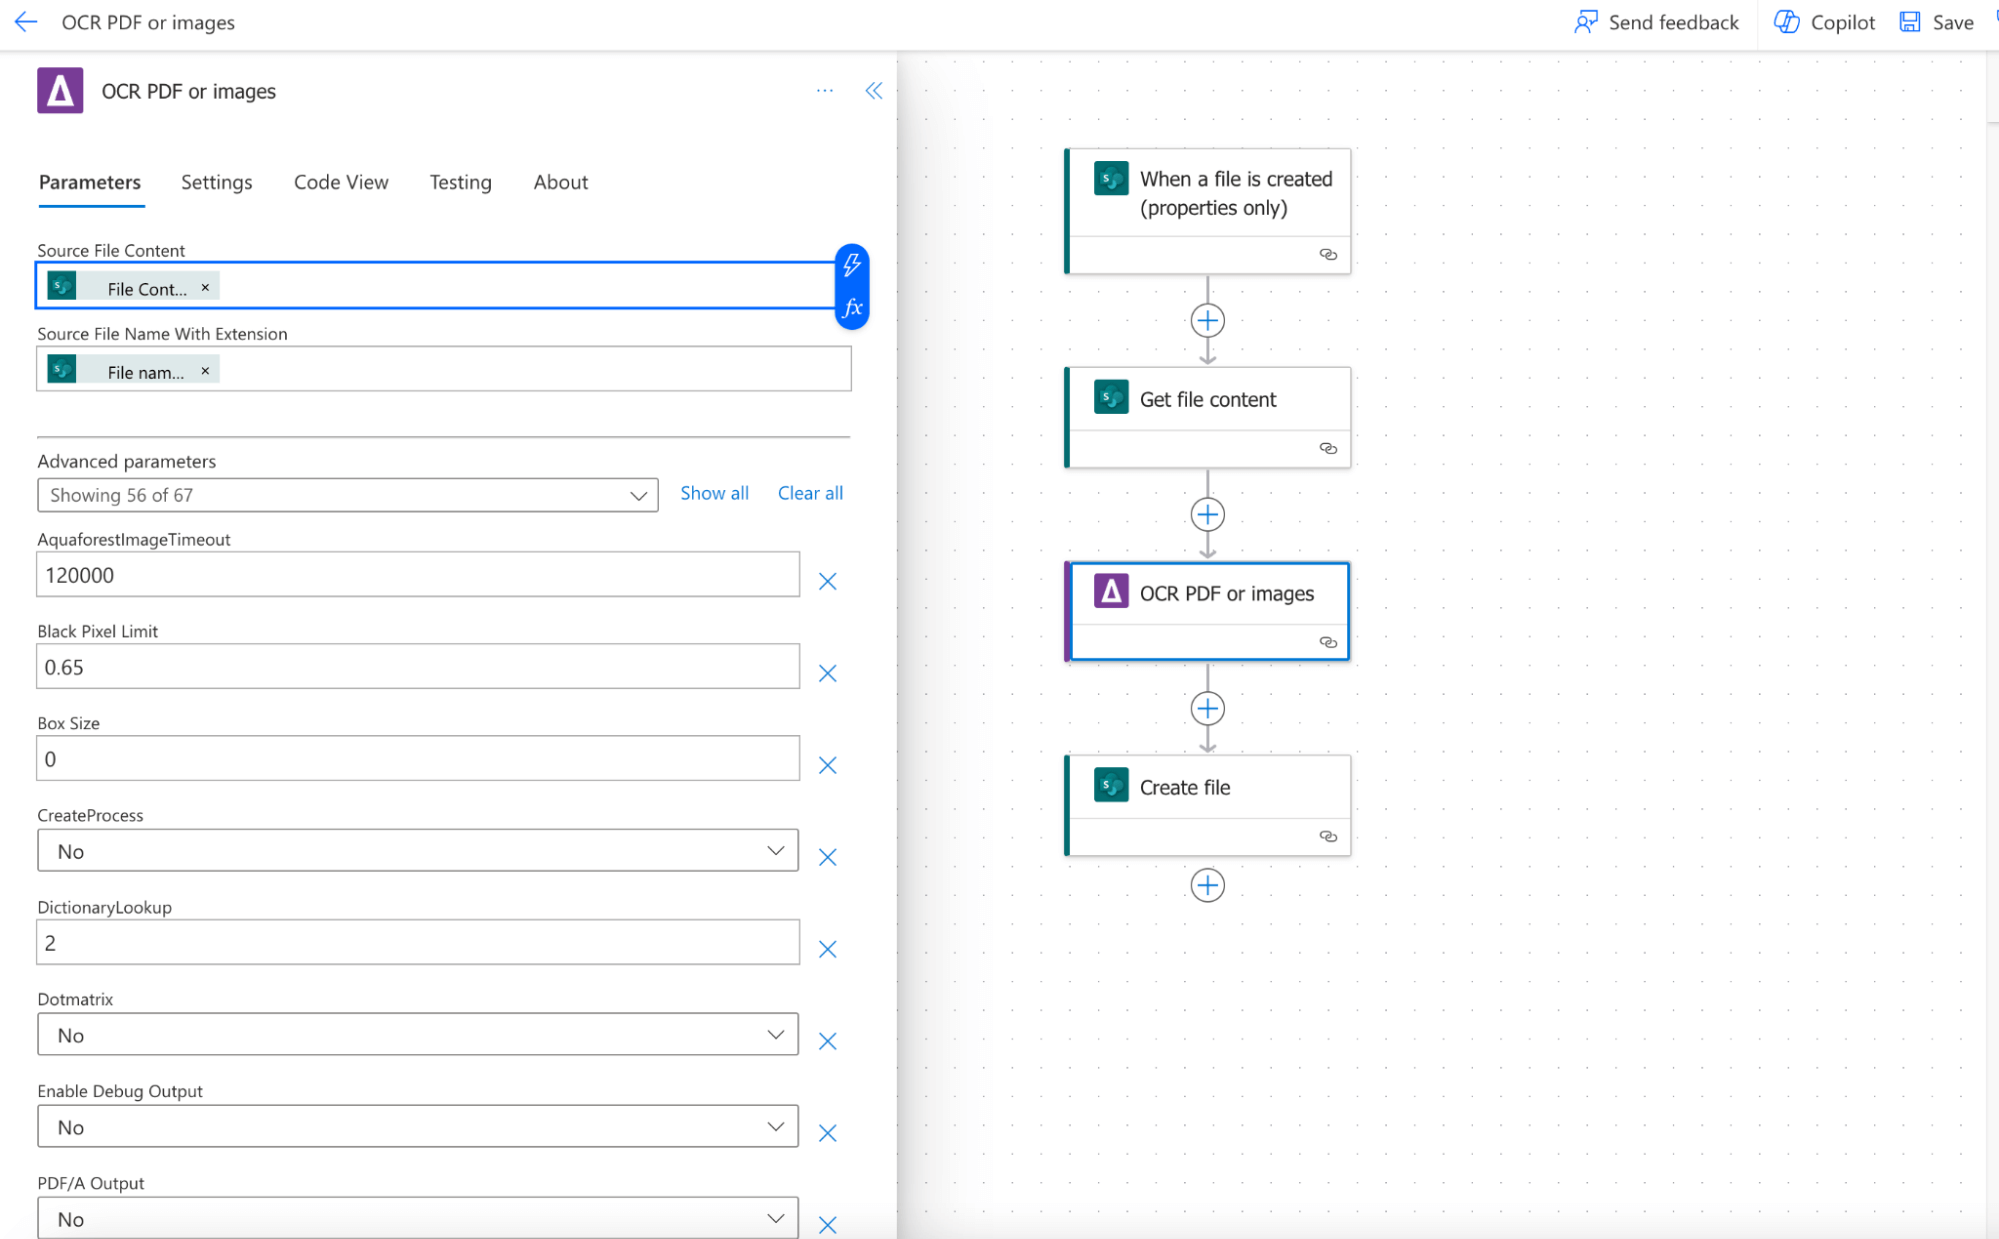
Add the Aquaforest PDF Connector to your Power Automate workflow. First you choose the type of the flow and the trigger.
For this example, we will choose the “Automated cloud flow” and set a trigger “When a file is created (properties only)”. This trigger is activated when an item is created, or modified in a library. As it returns only the properties stored in the library columns you need to add a “Get file content” step and use the “Identifier” property returned by this action to get to the contents of the file.
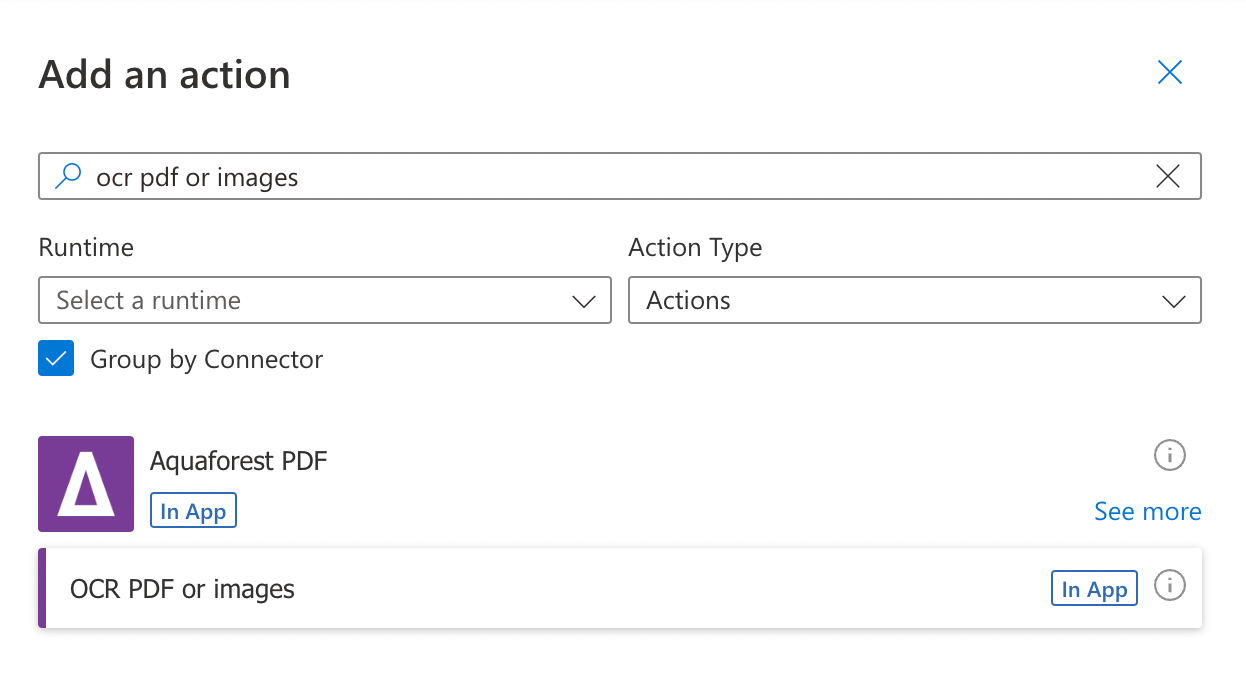
Click on the + button to add a new action, and in the search bar type “OCR PDF or images” action.
As a next step, you will be asked for a Connection Name and an API Key. Give your connection a name and use the primary key generated upon signing up for PDF Connector. If you need assistance, read the getting started guide, particularly Generate API key section.
Enter the source file content for the scanned receipt.
The two parameters above are mandatory but there are many other optional parameters. Check out here for more details. Define OCR settings, such as language preferences, auto-rotate, binarize, and more.
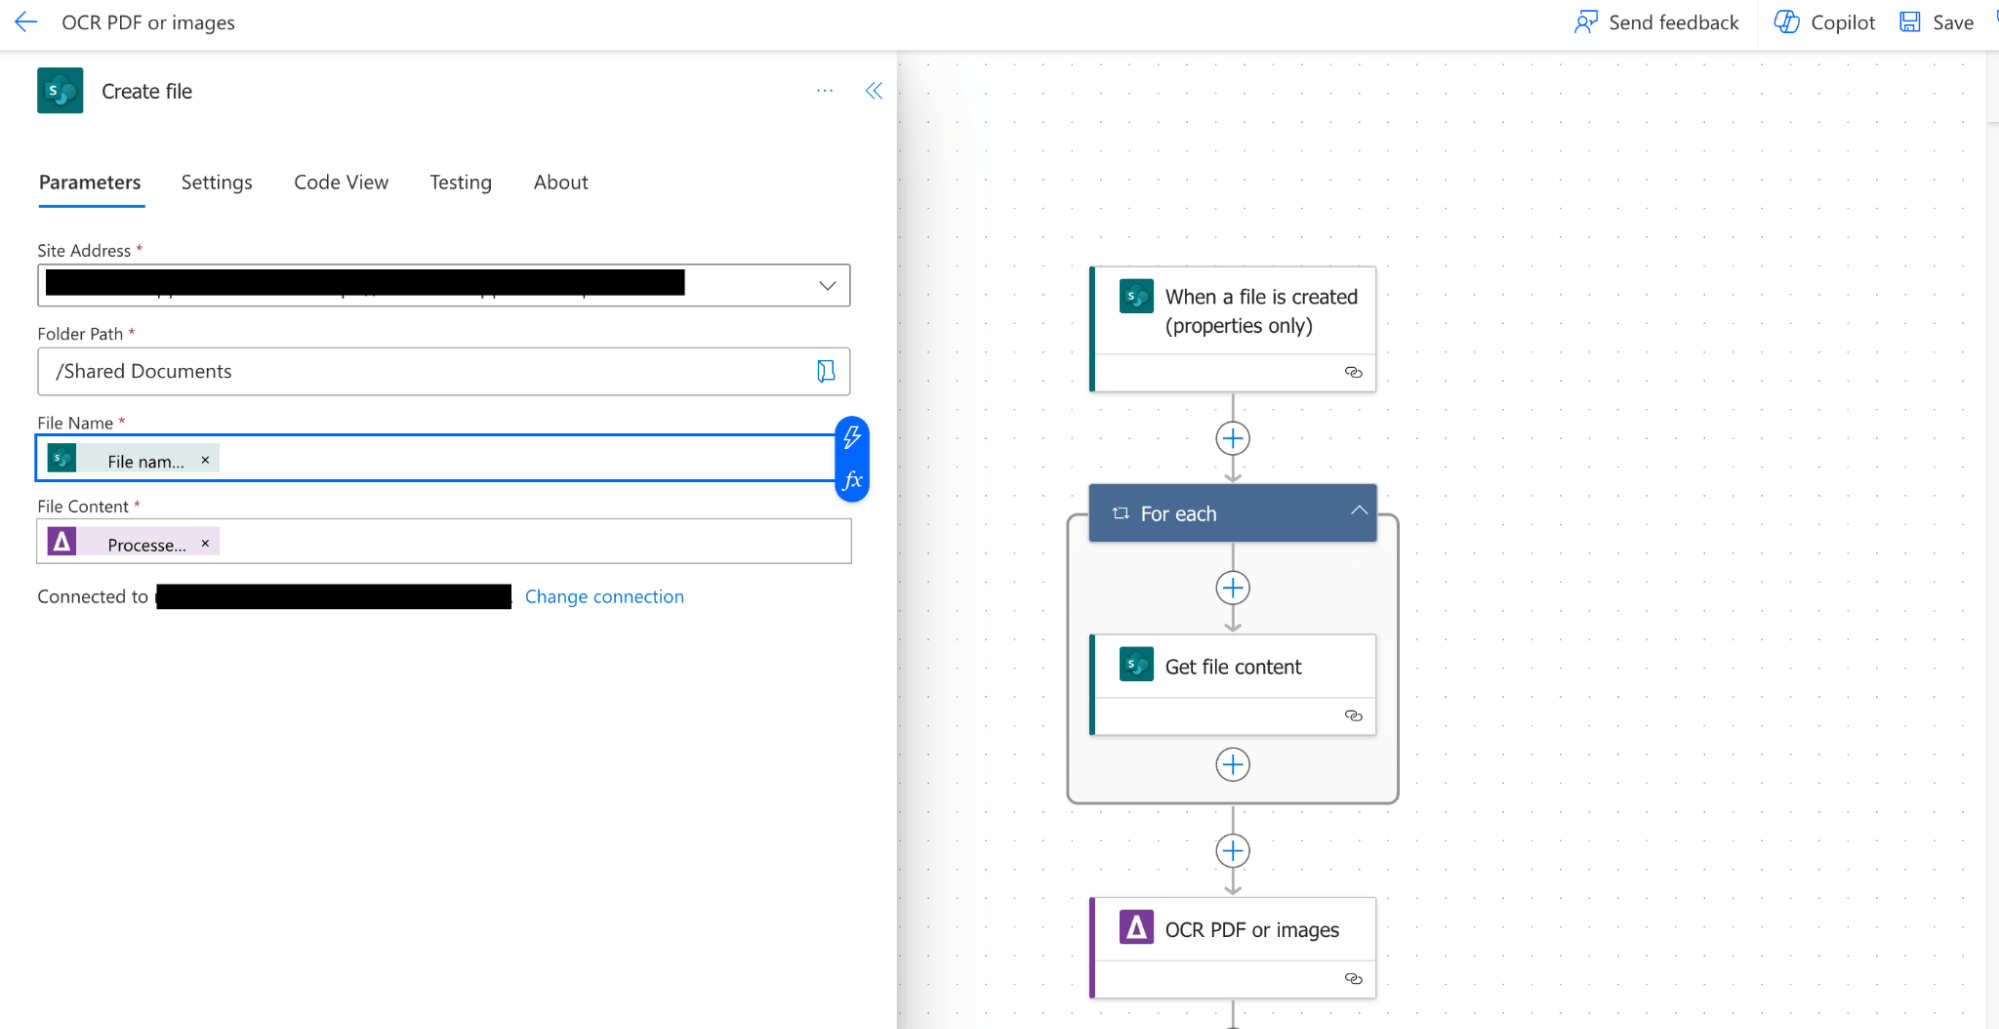
Add the create file action and configure following the details below:
Site address: The URL of your SharePoint site.
Folder path: The location of your SharePoint library where the output file will be stored. You need to store the OCRed PDF file into a different folder, or otherwise it will create an indefinite loop and the flow will be running all the time.
File name: The name of the OCRed PDF file. Click on the thunder sign and open Dynamic content. Type “File name with extension” in the search bar and click on Add.
File content: Click on the thunder sign and open Dynamic content. Click on See More to show all the output parameters and then click on Processed file content and confirm by clicking on the Add button.
You can also check other output parameters:
Click on the Save button and run the Power Automate workflow to execute the “OCR PDF or Images” action.
Check the output for the OCR-processed data extracted from the scanned receipt.
By incorporating the Aquaforest PDF Connector‘s “OCR PDF or Images” action into expense tracking workflows, professionals can simplify their processes, reduce manual effort, and ensure accurate reimbursement. This user guide provides a comprehensive walkthrough, empowering users like John to leverage OCR for efficient expense management.